| Contact us! |
| About us |
| FAQ |
| Privacy Policy |
| Terms of Service |
| Copyright / Credits |
|
President Mark Collins Petersen |
|
CEO Carolyn Collins Petersen |
| The PixelDome |
| Dec. 2013 update |
| Feb. 2014 update |
The PixelDome
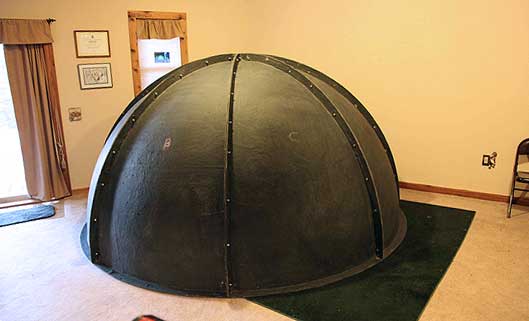
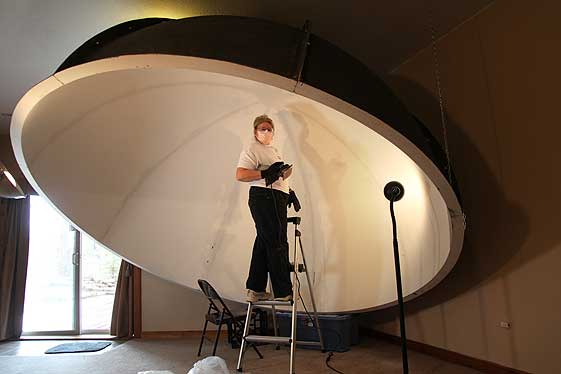
In the spring of 2012, we upgraded our production studios, retiring The LarryDome and installing The PixelDome — both named for famous felines here at Loch Ness Productions. (Select the pics for enlargements)
 As with the LarryDome, our dome choice was constrained primarily by the available space we had for it. The room ceiling is roughly three meters high, so our dome couldn't be much bigger than three meters in diameter. The LarryDome had been that same size, but we wanted a smoother projection surface.
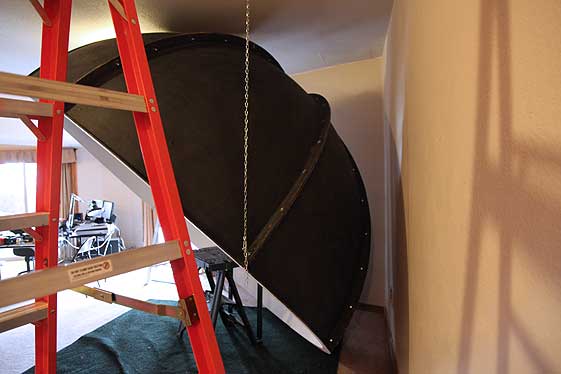
When we saw on the Internet that Steve Pielock had this 10-foot fiberglass dome for sale (it's from an old Viewlex planetarium installation), we knew we'd found our solution.
The dome has eight gores (orange-peel wedge shapes) that bolt together. The dome assembly was relatively straightforward; the only difficulty came when the two halves needed to be bolted together. We had no easy way to reach around and up to the very top to put in the remaining bolts in the holes. Rather than leaning a ladder up against the fiberglass panels or constructing some kind of scaffolding, we decided it seemed sturdy enough without those last couple of bolts up there.
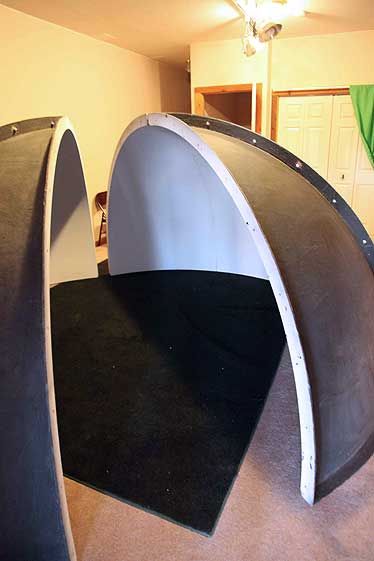
 Perhaps the biggest challenge was figuring out how to mount it. We knew the dome would spend most of its time in a tilted position, for our ease of working under it. But we did want to be able to level it, primarily for doing quality control checks on our full fisheye movies.
 After plotting out plans for various frameworks, we decided to just suspend it on chains from two J-hooks drilled into ceiling joists. Thanks to neighbor and retired planetarian Dalton McIntosh (formerly at the Einstein Planetarium in Washington, D.C.) who now lives on the next mountain over; he came over and lent some tools and brawn to git'r'done! Dalton's wife Terri actually suggested going the suspension route.
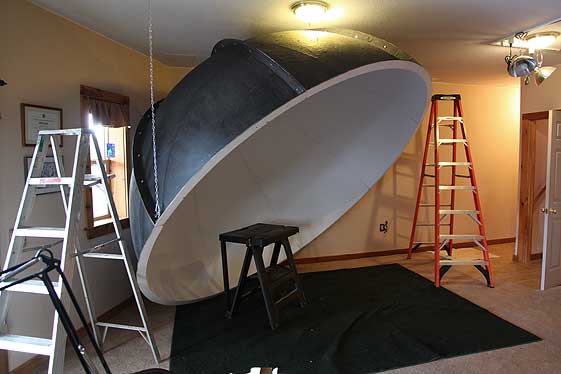
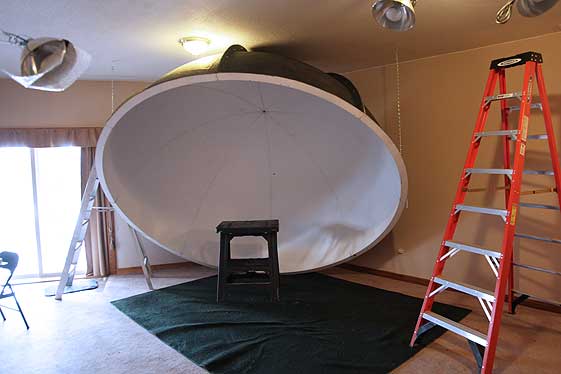 The dome installation is still a work in progress as we figure out a good way to enable our "tip-tilt" mechanism. But, we set up our Sky-Skan definiti PD system, and sure enough, with "first light", it looks like things will work fine.
 Of course, the initial tilt illustrated here, with the lip of the dome resting on the floor is too much. It's probably close to 45 degrees. We'll have to come up with something to hold up the front edge, closer to the usual 25-30 degrees of tilt found in many theaters.
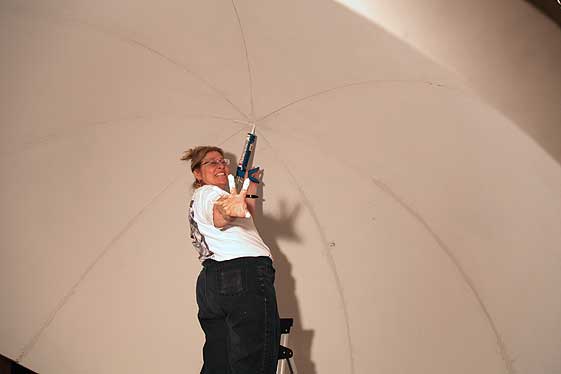 Once we got the dome chained up, a little grunt work was in order — caulking the seams and sanding, followed by painting. Some sources recommended using Bondo to join the seams, but that seemed a little overkill, what with the need for a respirator and the mess and hazards of the dust. After receiving advice from Richard McColman, who recently set up an 8-foot fiberglass dome in his production studio at Morehead Planetarium in Chapel Hill, NC, we decided to go with simple painter's caulk from the hardware store.
 We probably overdid it with laying on the caulk, as there are some areas which have mounds over the seams. Naturally, we had to sand them down, because we were concerned they'd show up under projection lighting.
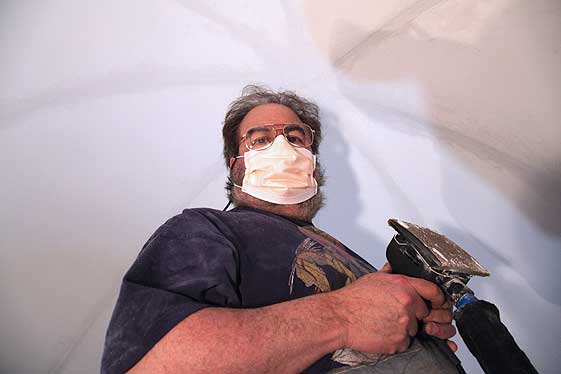 The last part of the grunt work was painting. Even though the surface of the original dome was pretty good, it was very white — far too bright for video projection. Naturally, we need all the help we can get to minimize backscatter and keep contrast high. We had a piece of Avela Go-Dome fabric (thanks, Pat Reiff and Carolyn Sumners), so we took it to the paint department of the local Ace Hardware and said, "here, match this gray." The guy put it under the scanner, punched in the resulting formula into the dye selector, and about ten minutes later we walked out with a gallon of gray paint.
Here's a video of us hard at work, with brush and roller, and ending with the final test on the dome showing our newly gray, macro-seam dome!
Painting the PixelDome!

YouTube player loading...
Music by Geodesium, adapted from Cosmic Cannonball, from Double Eclipse.
No, we don't know what the reflectivity is; please come over with your meter and let's measure those foot-lamberts!
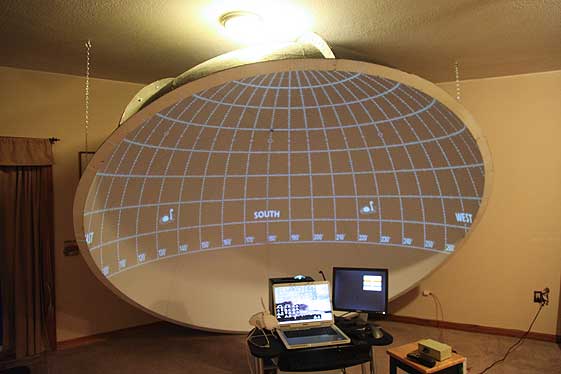
Here are some quick pics of the place in its 2013 configuration.
![]() The black box in the center is the Sky-Skan Definiti PD. At the back of the dome is our ePlanetarium Newtonian-2 spherical mirror setup. We built stands out of some leftover framing lumber to hold them both at the proper tilt angle. One of these days, we'll have to paint the wood black, just like a real planetarium.
The black box in the center is the Sky-Skan Definiti PD. At the back of the dome is our ePlanetarium Newtonian-2 spherical mirror setup. We built stands out of some leftover framing lumber to hold them both at the proper tilt angle. One of these days, we'll have to paint the wood black, just like a real planetarium.
![]()
We attached 5 Logitech 5500Z surround speakers under the lip of the dome, and the subwoofer is back in the corner. Unfortunately, the cord for the controller isn't long enough to reach to our console, and apparently you can't get or make an extension for it; I tried. So it sits on the floor and we control the audio by aiming the remote control at it.
The laptop on the console is running DigitalSky 2, and the GPU computer is under the table, with its monitor for the PD to the left. To the right is an iMac, running WarpPlayer (and VLCWarper) to feed the spherical mirror.
![]() And a view from inside the dome. We have an Optoma TH1060P HD projector in the Newtonian box. Normally we wouldn't run both projectors at the same time, of course; the geometry of the two systems isn't identical (the fisheye lens projector is much more accurate). If you notice the bowing of the grid around the horizon... well, it turns out our mirror isn't perfectly spherical. It's close enough for our purposes.
And a view from inside the dome. We have an Optoma TH1060P HD projector in the Newtonian box. Normally we wouldn't run both projectors at the same time, of course; the geometry of the two systems isn't identical (the fisheye lens projector is much more accurate). If you notice the bowing of the grid around the horizon... well, it turns out our mirror isn't perfectly spherical. It's close enough for our purposes.
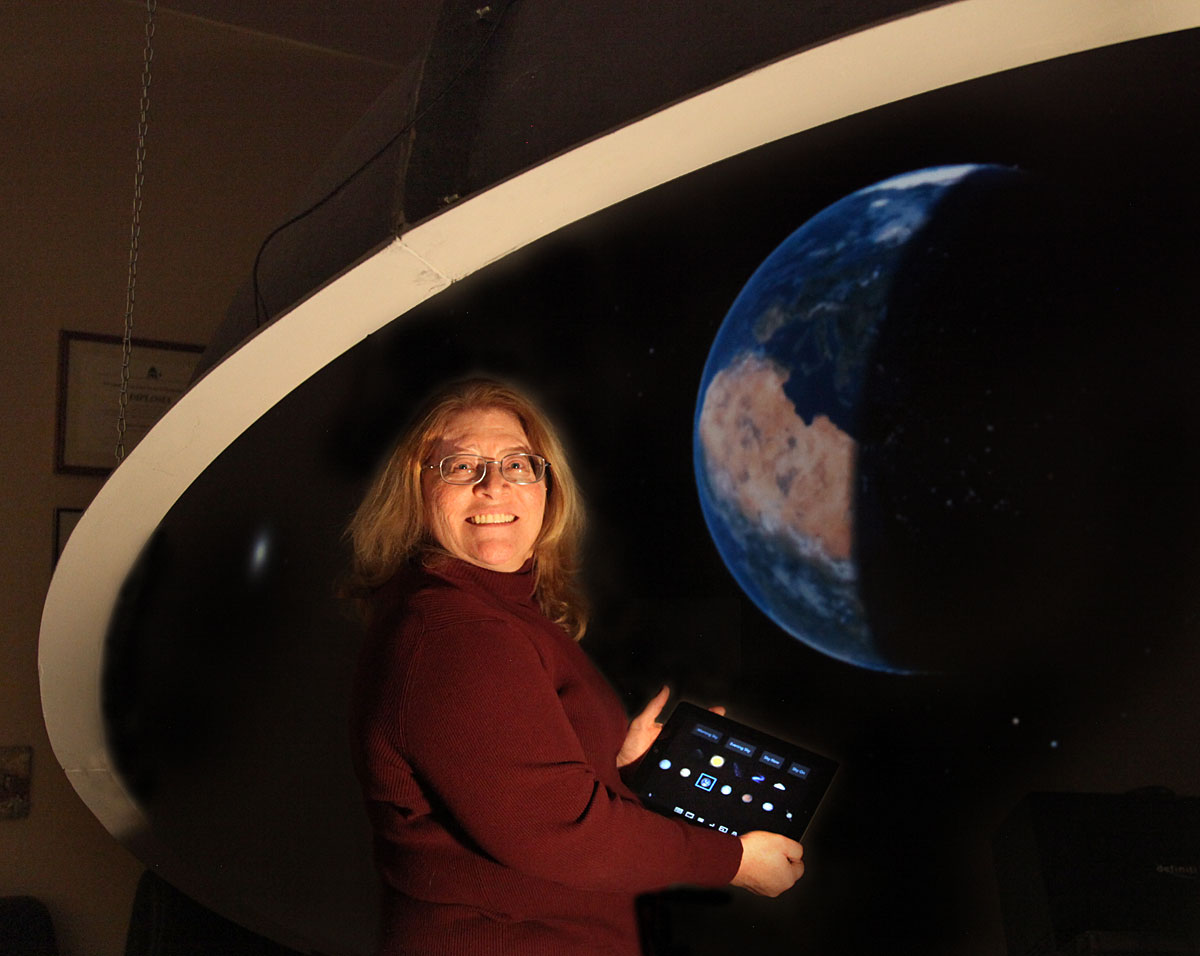
February 2014 - A couple of pix with our latest acquisition, an Evans & Sutherland Digistar 5 Workstation.
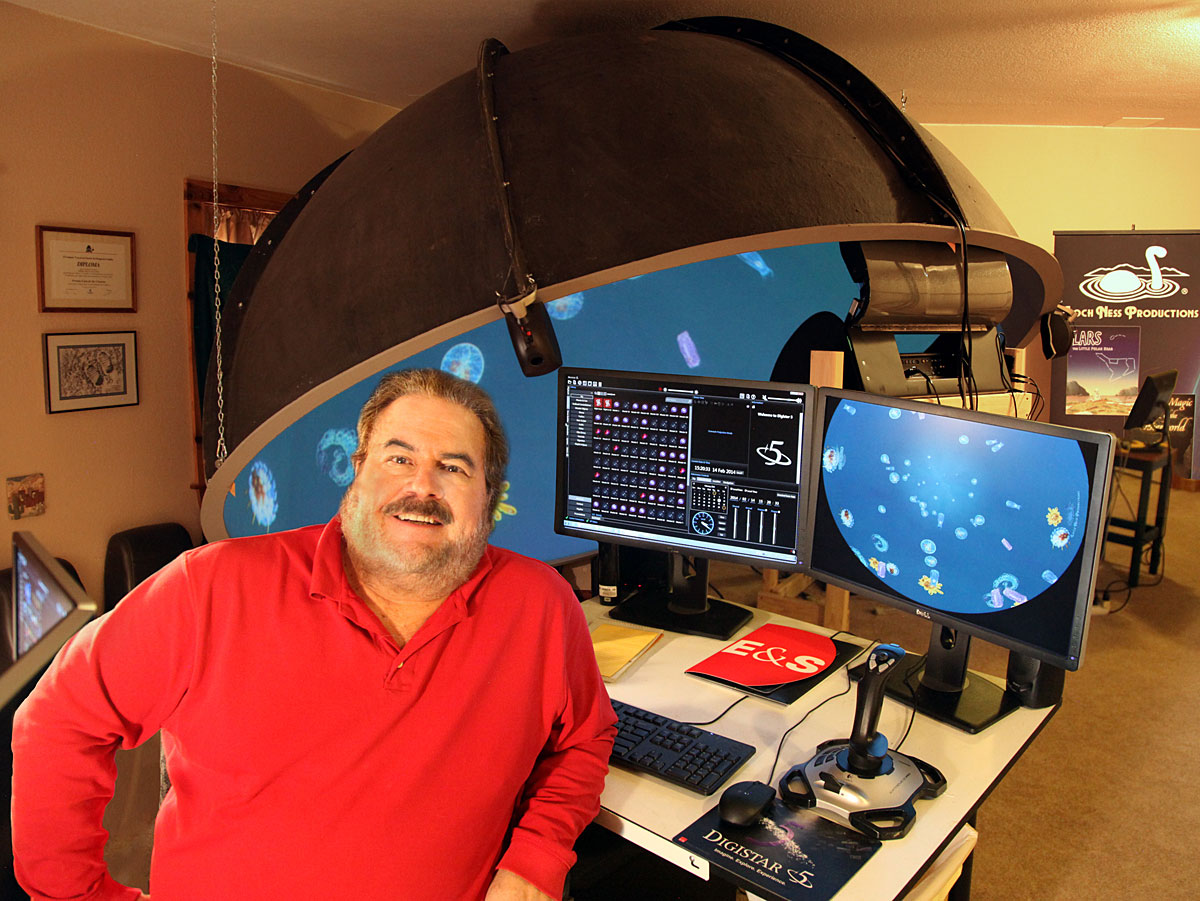
Above, Mark mans the desktop; below, Carolyn controls the Digistar 5 remotely with her iPad.