
Select pics to enlarge
Using After Effects to make fulldome movies for distribution
The Relentless Struggle
by Mark C. Petersen, Loch Ness Productions
A presentation for the IMERSA Summit,
Denver, Colorado, March 2014
In which we discuss the ins, outs, and IT minutiae regarding the organization of our After Effects projects.
At Loch Ness Productions, our key to success in making fulldome movies is Adobe's After Effects. It's our über-application for making movies.
As distributors, what we do is take a producer's end product — the dome masters and soundtrack — and make movies that we provide to our customers. It's Loch Ness Productions policy that we do not ship dome masters to customer sites, only ready-to-play movies. There are several reasons for that, which I go into at length on our blog, so please go the web site and read my blog entry.
After more than a decade of doing this kind of thing, I have a process I settled on that works pretty well. There are still far too many variables and ways to go wrong, as I find to my dismay. Still, the basic process is the same for everyone's movies.
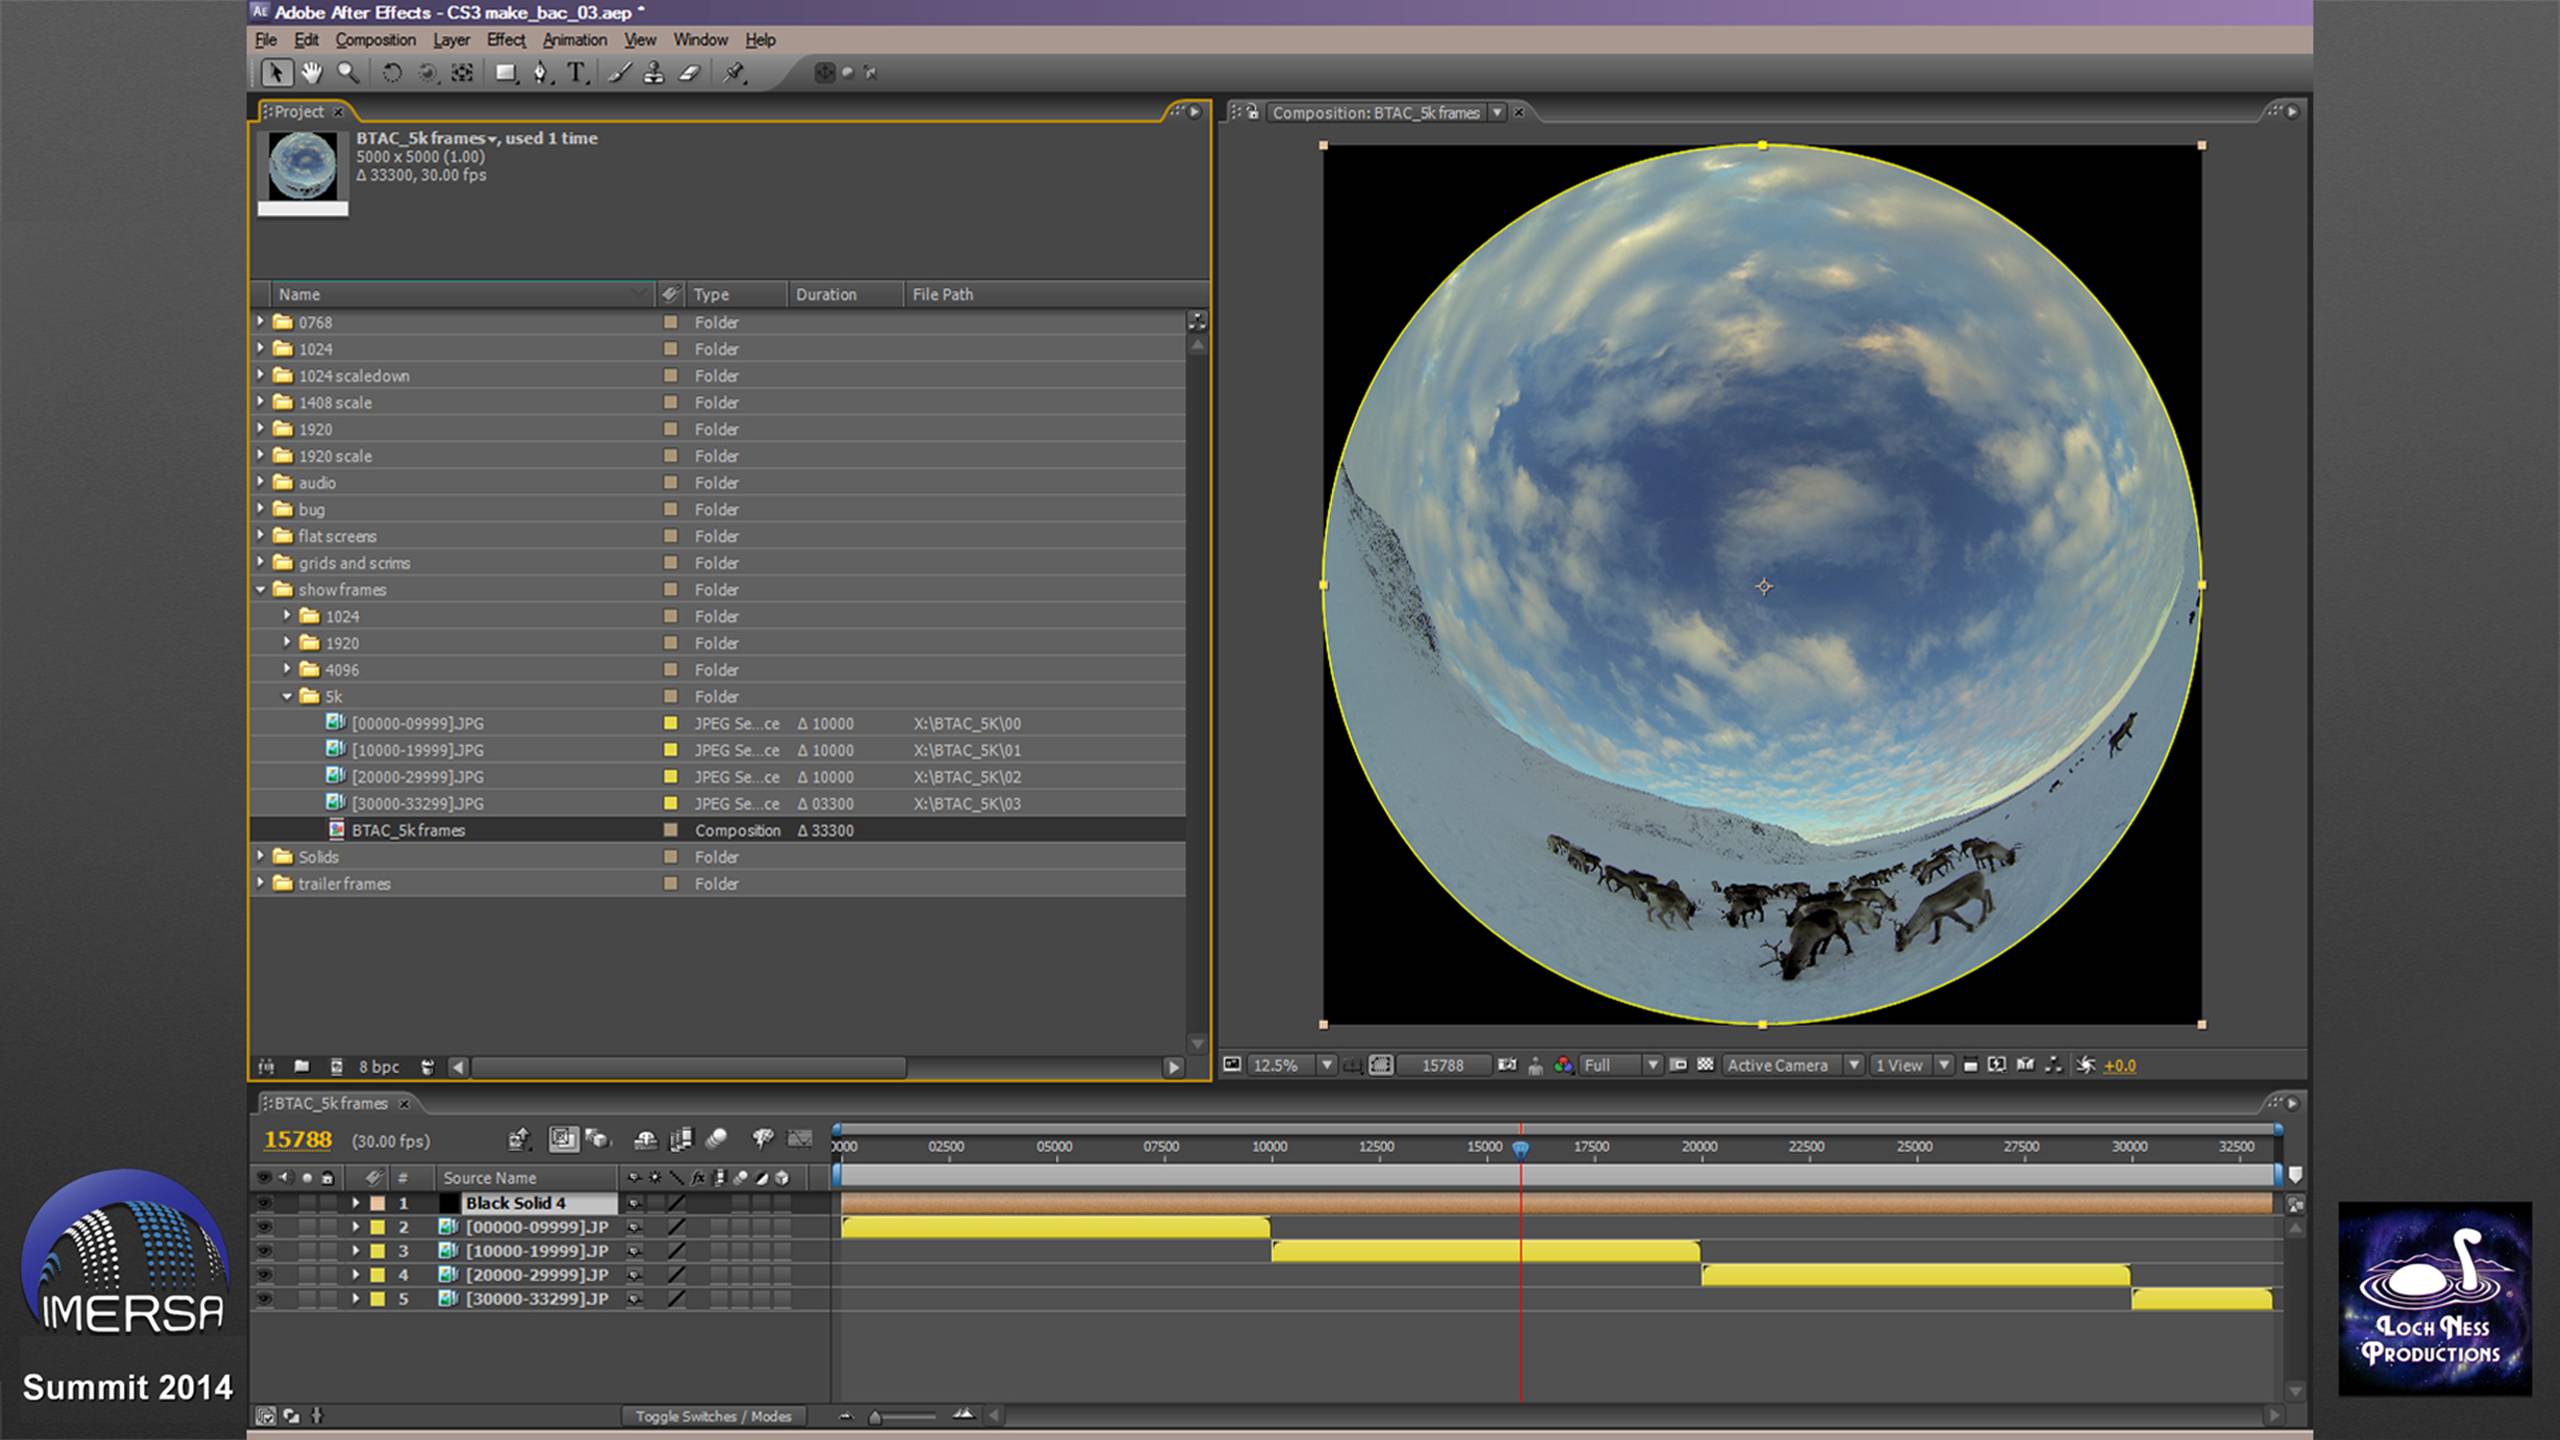
I have to be organized. This is the basic "Make movies" project I use. I have a folder called "show frames", and subfolders named with the size of the dome masters they contain. This is the latest addition to our distribution catalog, Beyond The Arctic Circle. The dome masters that Benjamin River Productions sent me were 5K by 5K. Well, I have nothing that can display 5K movies. Not even 4K. The best I can do in our own dome is 2K, and that's true for the majority of our customers too. So it's great they shot in such great resolution, but we can't make use of it. We have to scale the dome masters down to make movies we and our customers can display.
With the show's dome masters organized in folders of 10,000 frames each (see my other IMERSA presentation, Ingestion Indigestion), I lasso them in Explorer and drag them into the Project window, into the 5K folder. Then I go off and do something else for a while, because it will take After Effects a long time to read them all in. Once there, I select them all and drag them onto the composition icon; it creates a composition the size and duration of the frames; I select Sequence Layers, and voila, they're all there in the timeline.
You know all those logos and frame counters and things you put in the corners of your dome masters? The movies we make absolutely must have black in the corners, nothing else. Why? Because if you have a spherical mirror system, you see the corners projected as "dog ears" on the dome in back. On some fisheye systems, the physical masking isn't so good, and you can see the corners projecting on the wall below the dome. We can't have that. So the first thing I do is add a black solid layer on top, with a circle mask hole, to cover up whatever's in the corners.
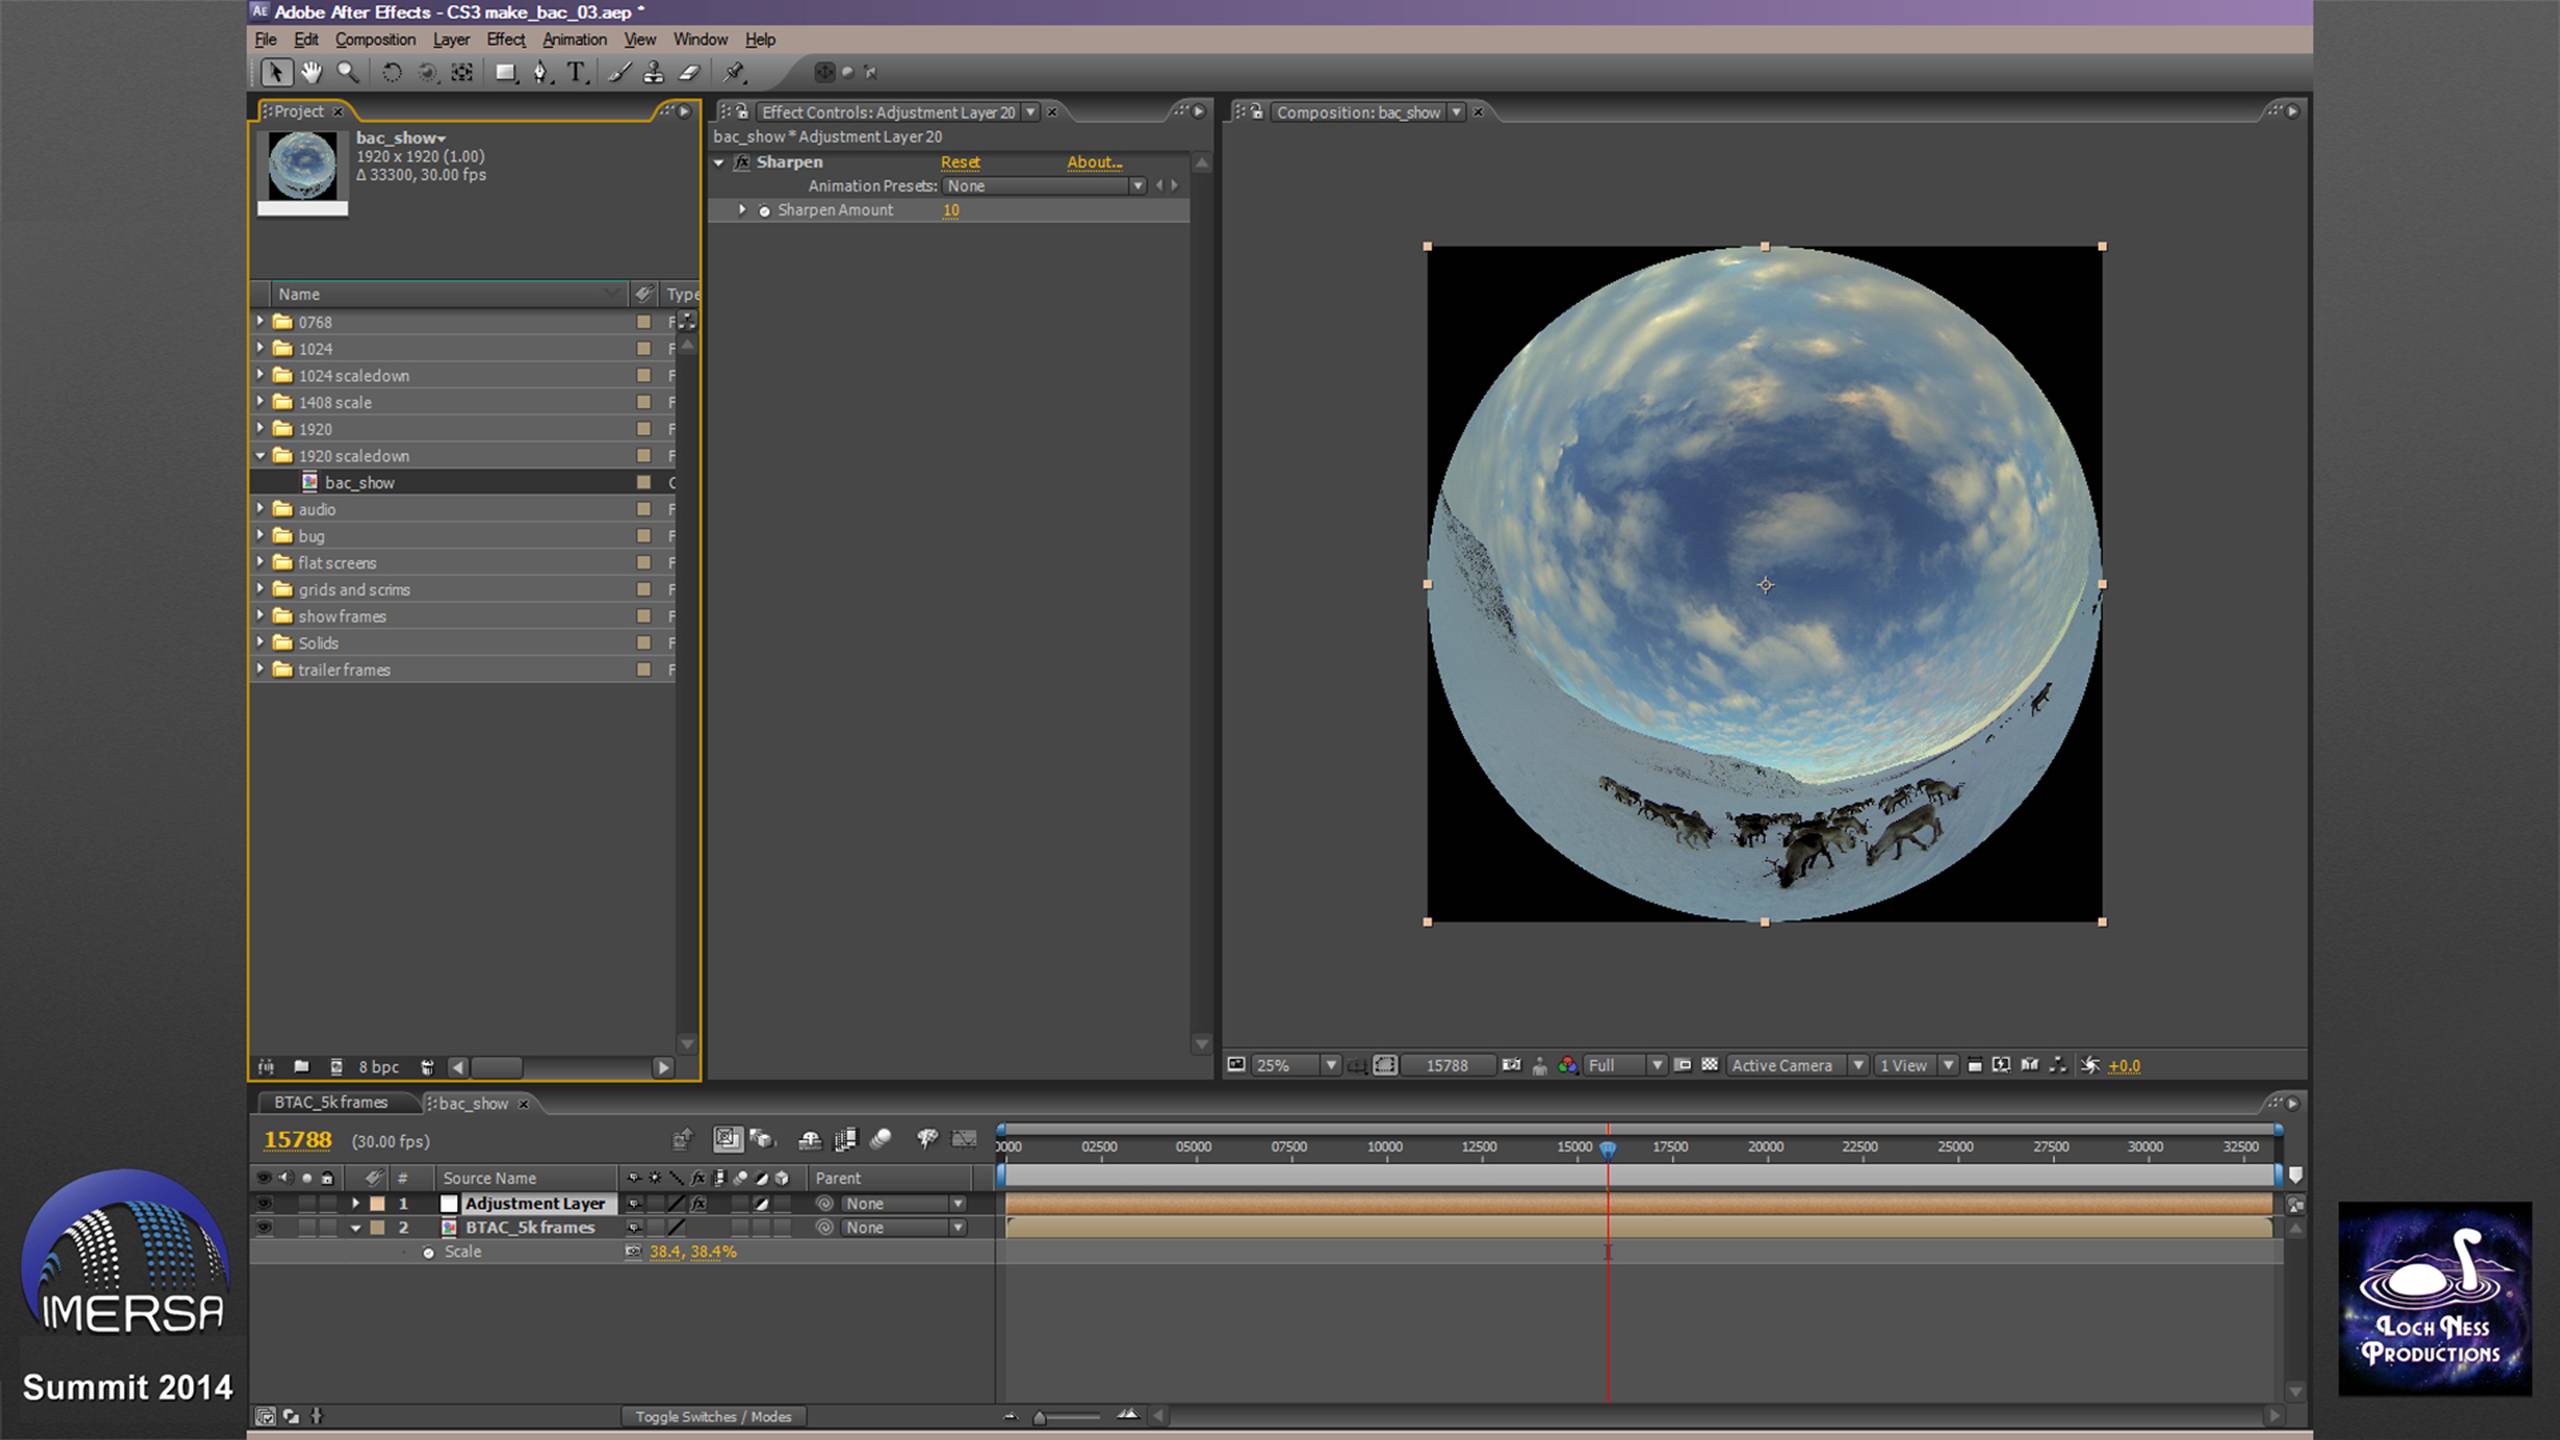
Now I use this 5K composition as the source for my 2k scaledown. I create a composition 1920 x 1920px, drag in my 5K source layer, and scale it down to fit. Grab the calculator, divide 1920 by 5000 in this case, and multiply by 100 to get the percentage amount to downscale.
Now when you downscale, you're necessarily throwing away resolution. The resulting image is softer and blurrier, because you discarded so much data. I'll often add a Sharpen adjustment layer to compensate, to try to crispen the image back up some. This can make a big difference, especially with star fields.
OK, we're ready to render a new set of frames.

Fortunately, we can throw all the machines in the render farm at the downscaling project. We select the Output Module preset for, in this case, JPG sequence, maximum quality.
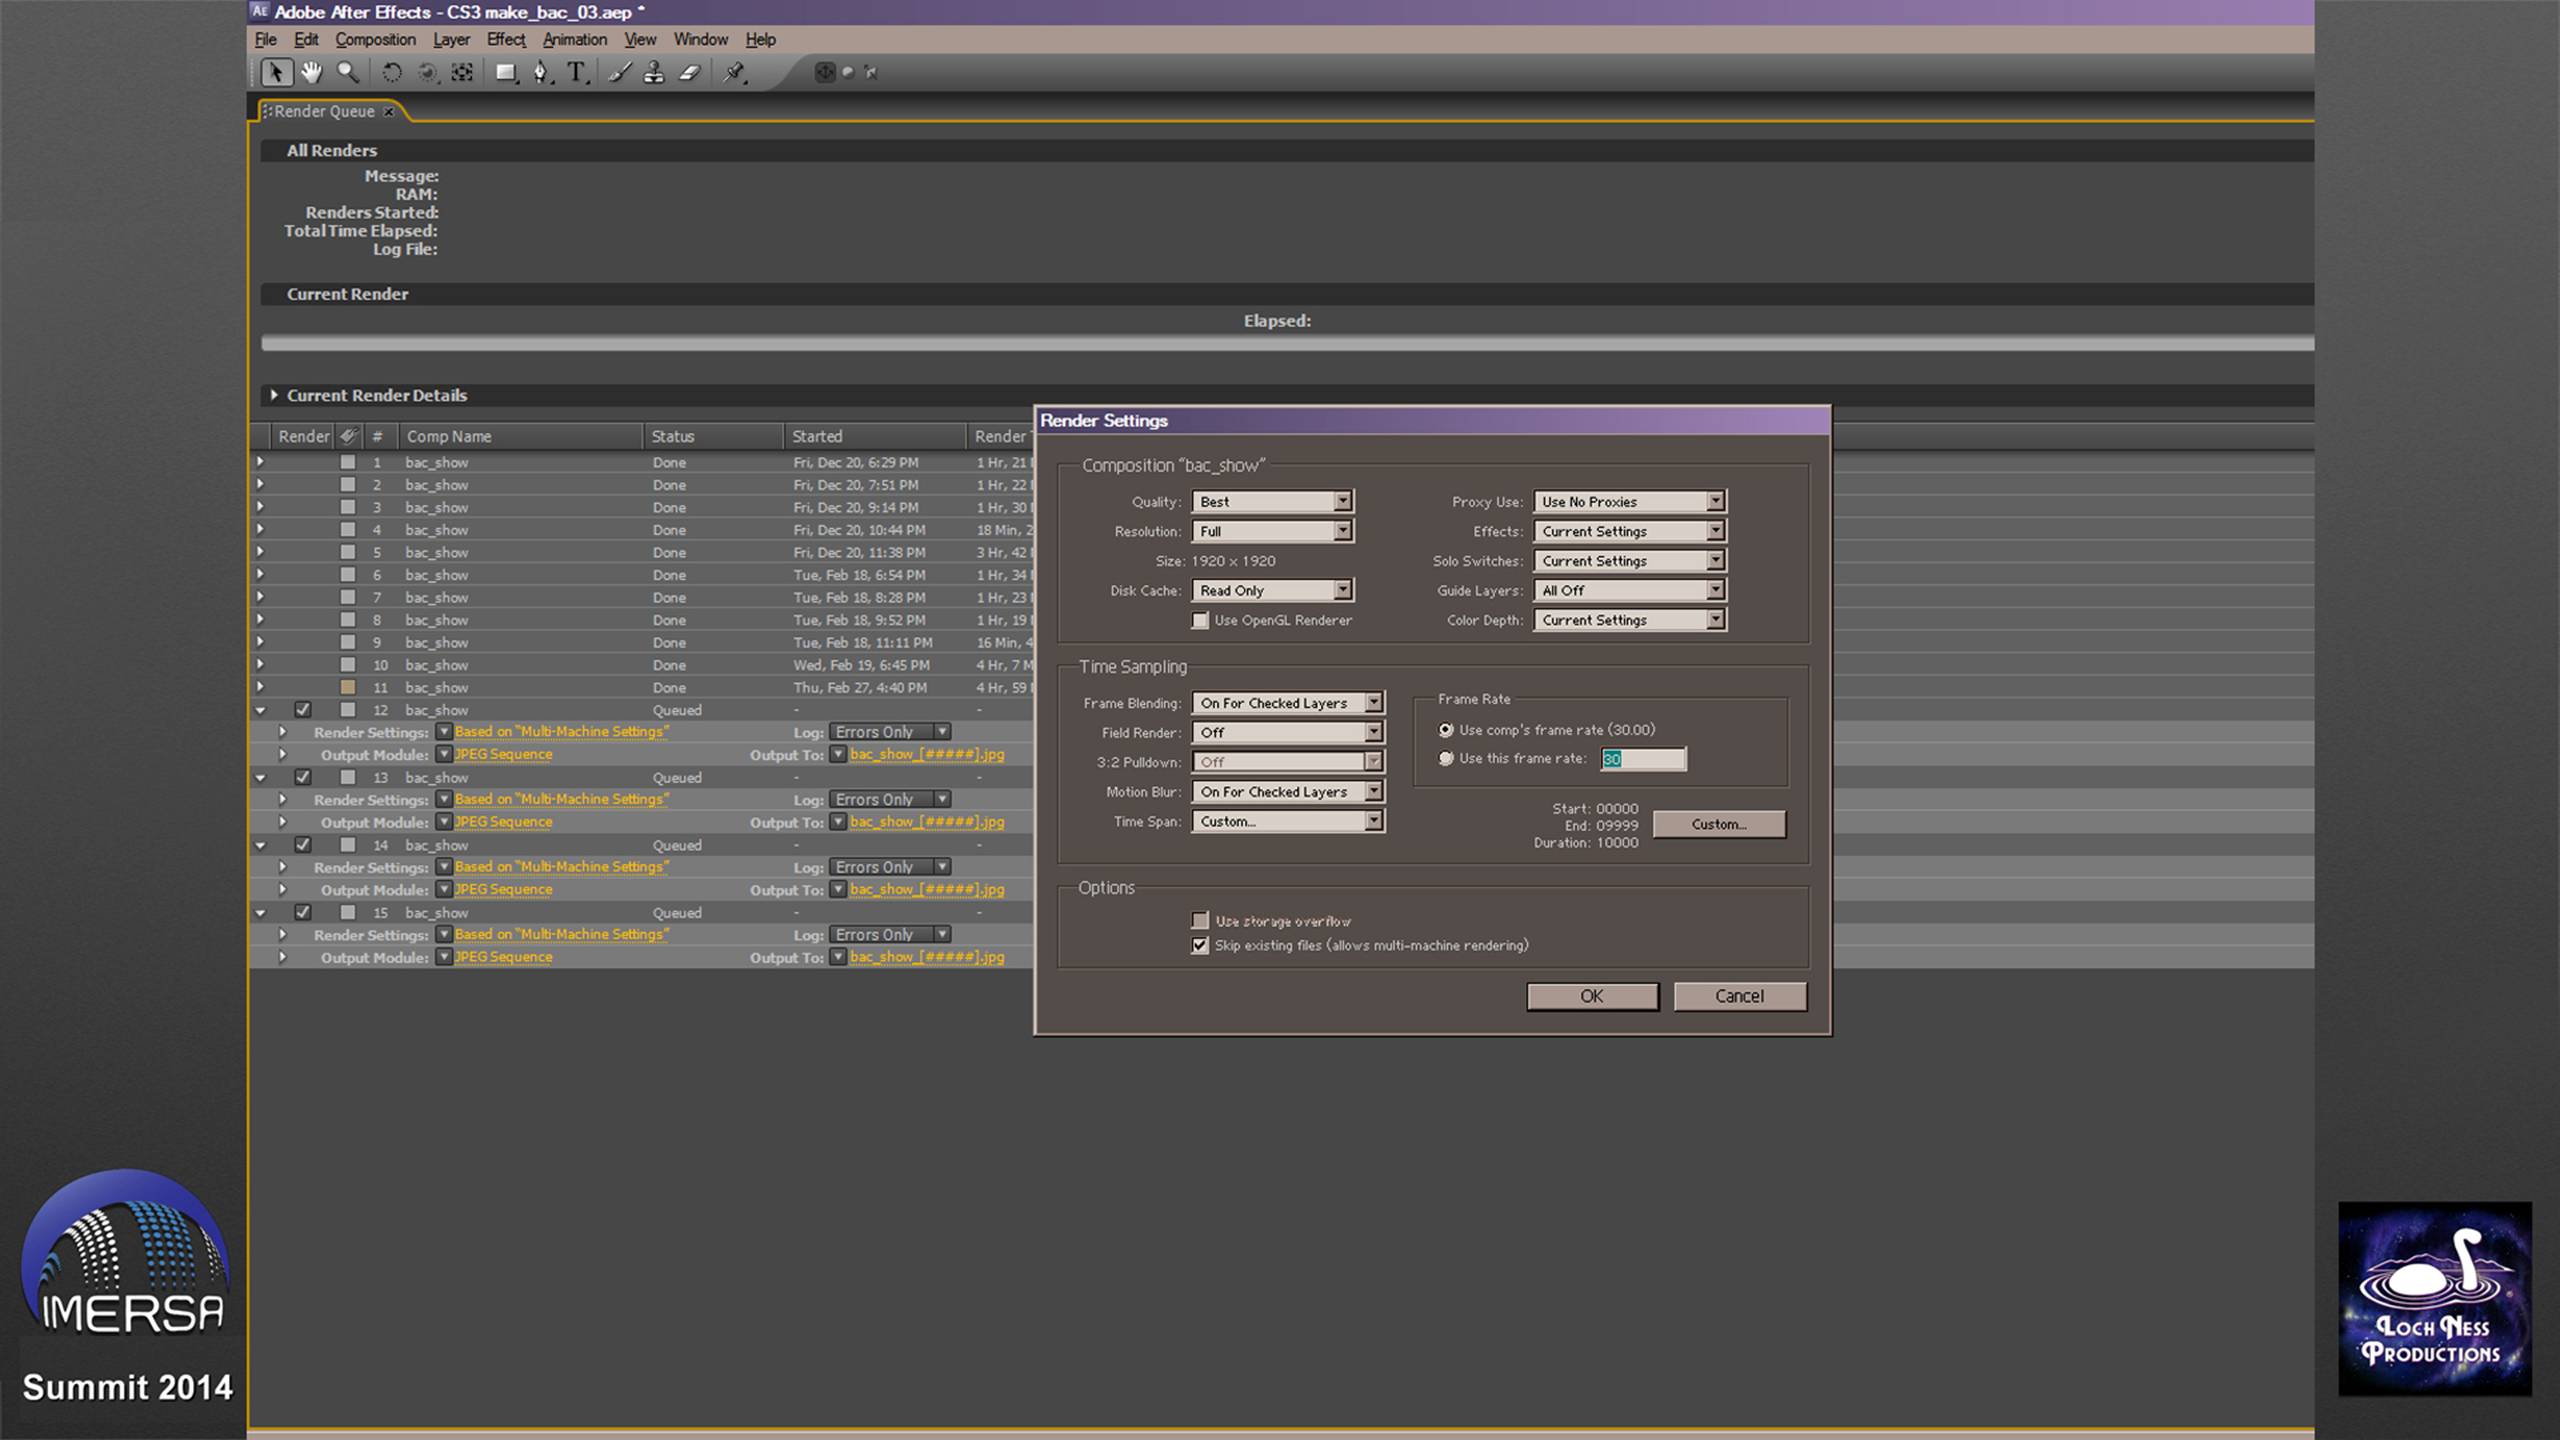
In the Render Settings, make sure "Use storage overflow" is unchecked, which will allow you to check "Skip existing frames" and do a multi-machine render.
We're putting our rendered frames into folders of 10,000 frames each, so we set the start and end points using the Custom duration button.
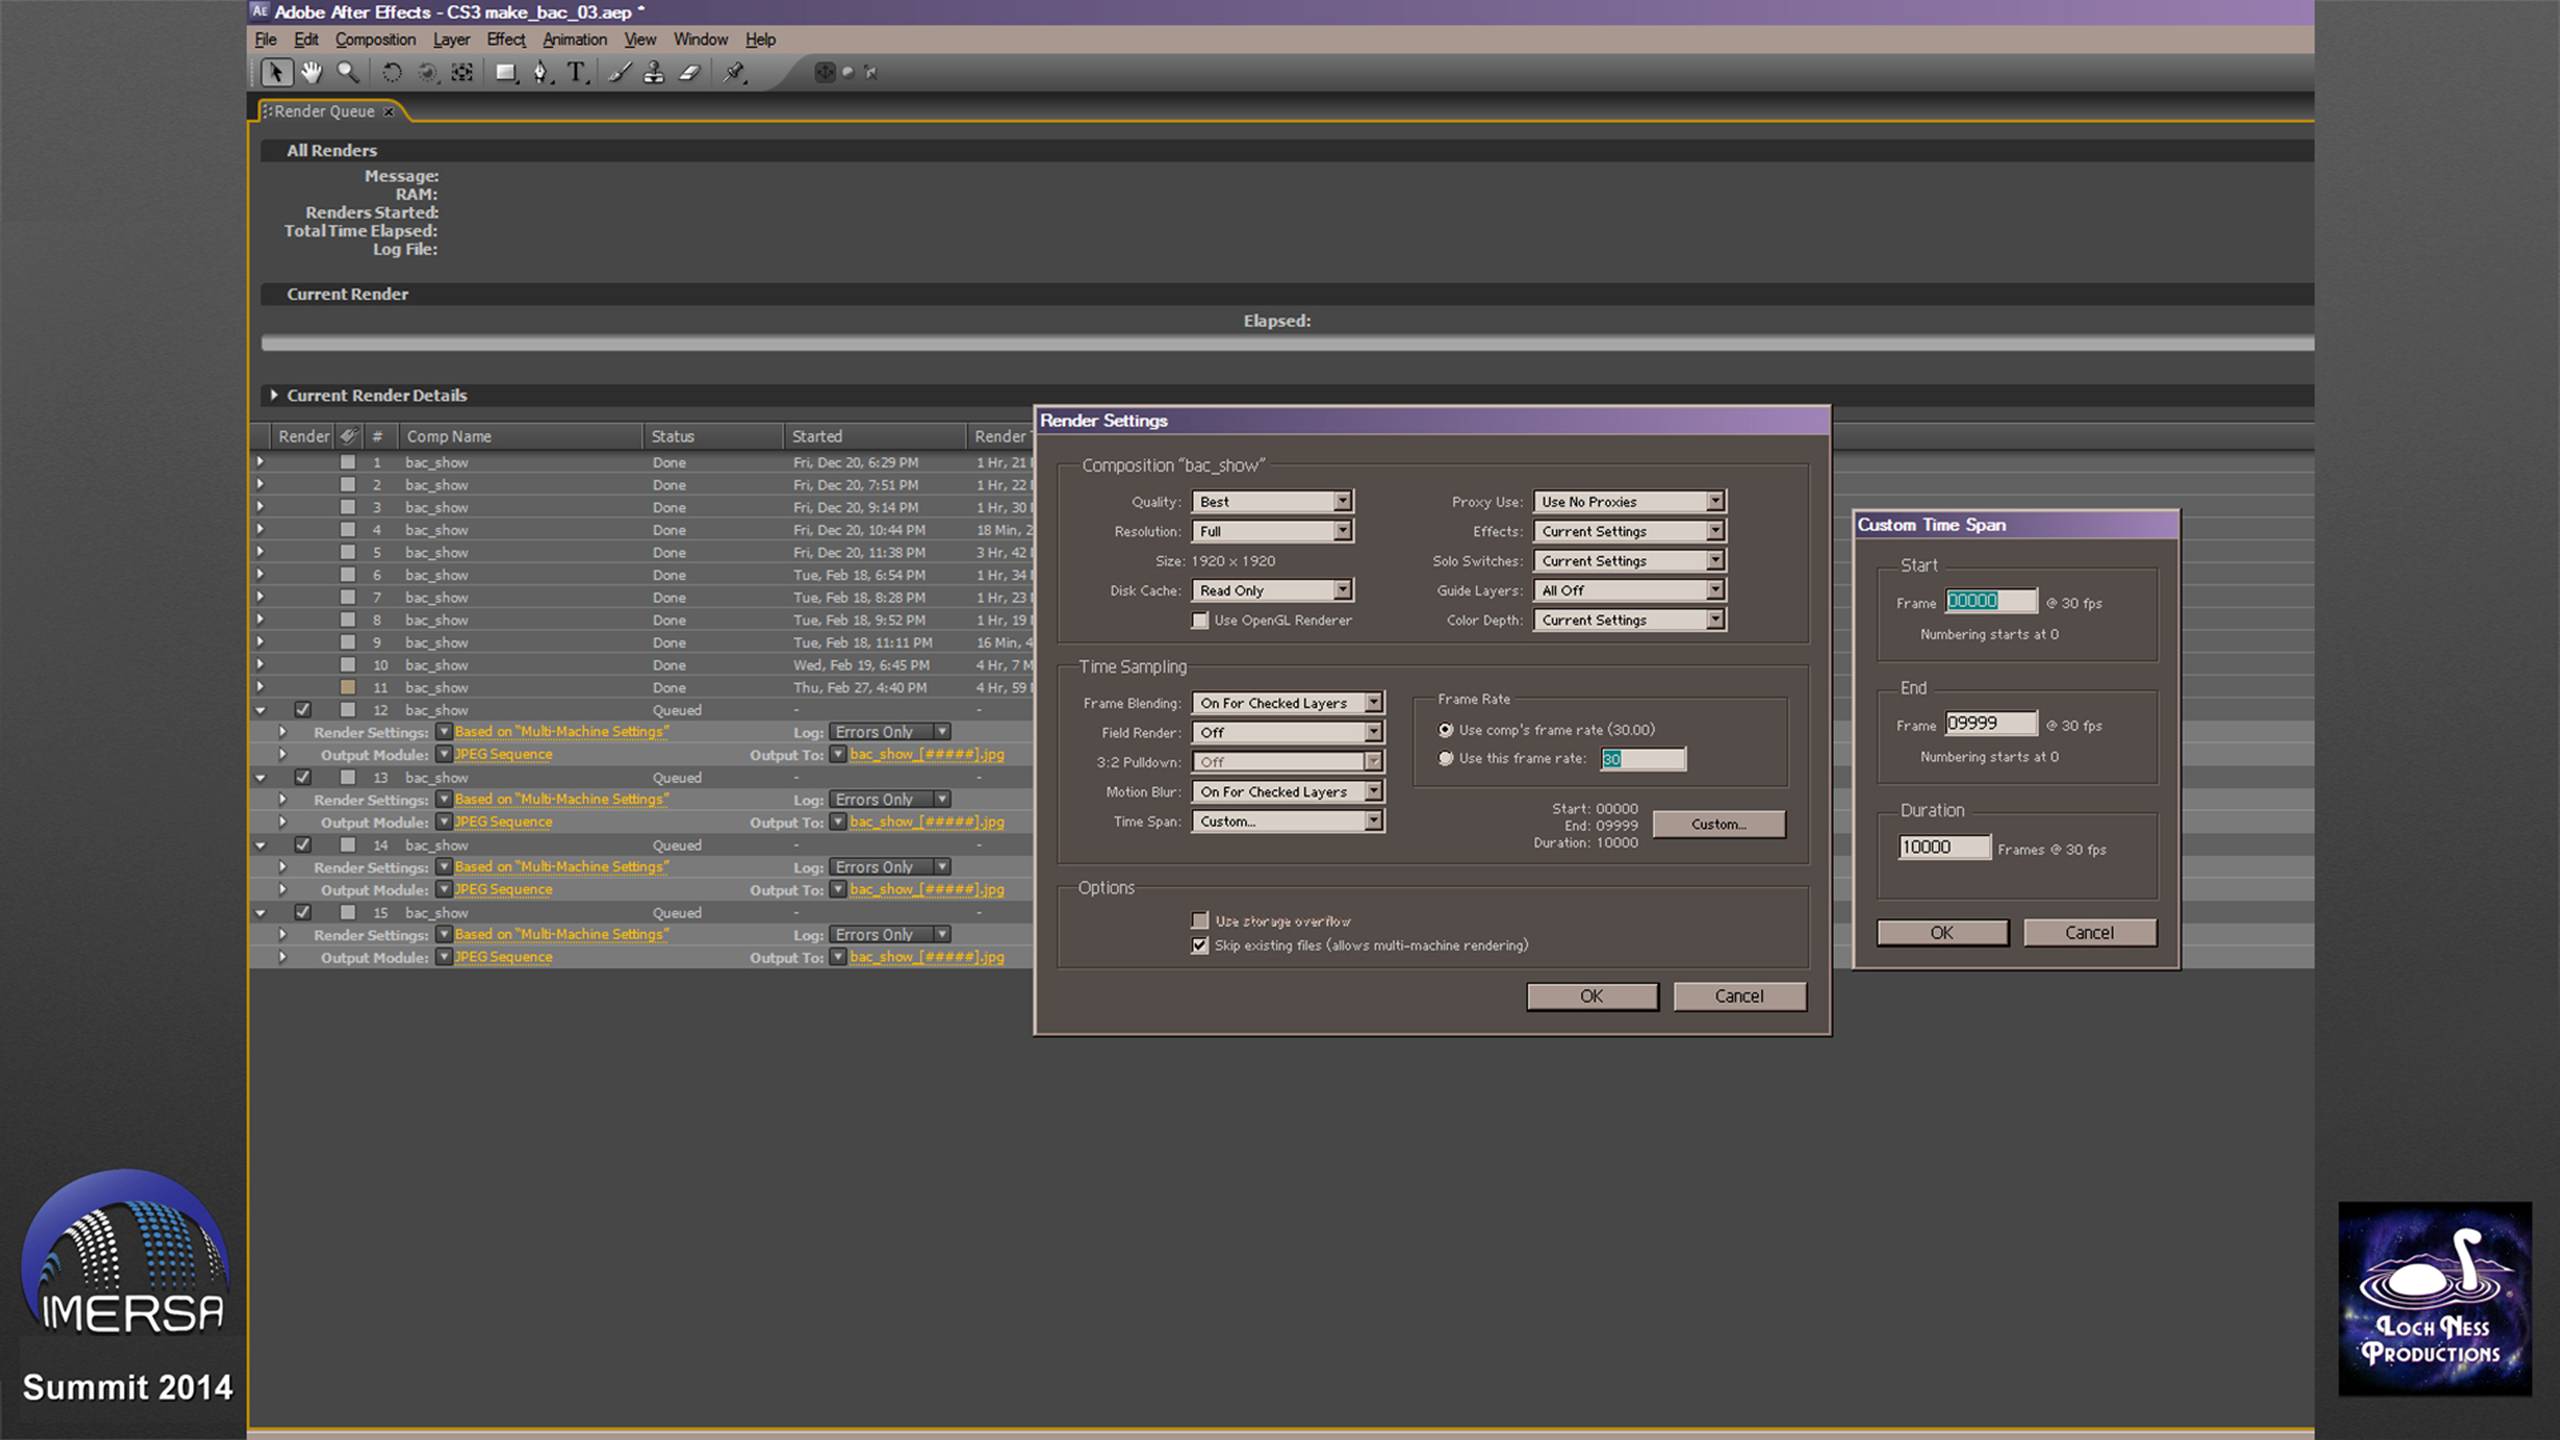
The first render item starts at 00000 and ends at 09999.
The next one starts at 10000 and ends at 19999.
And so on.
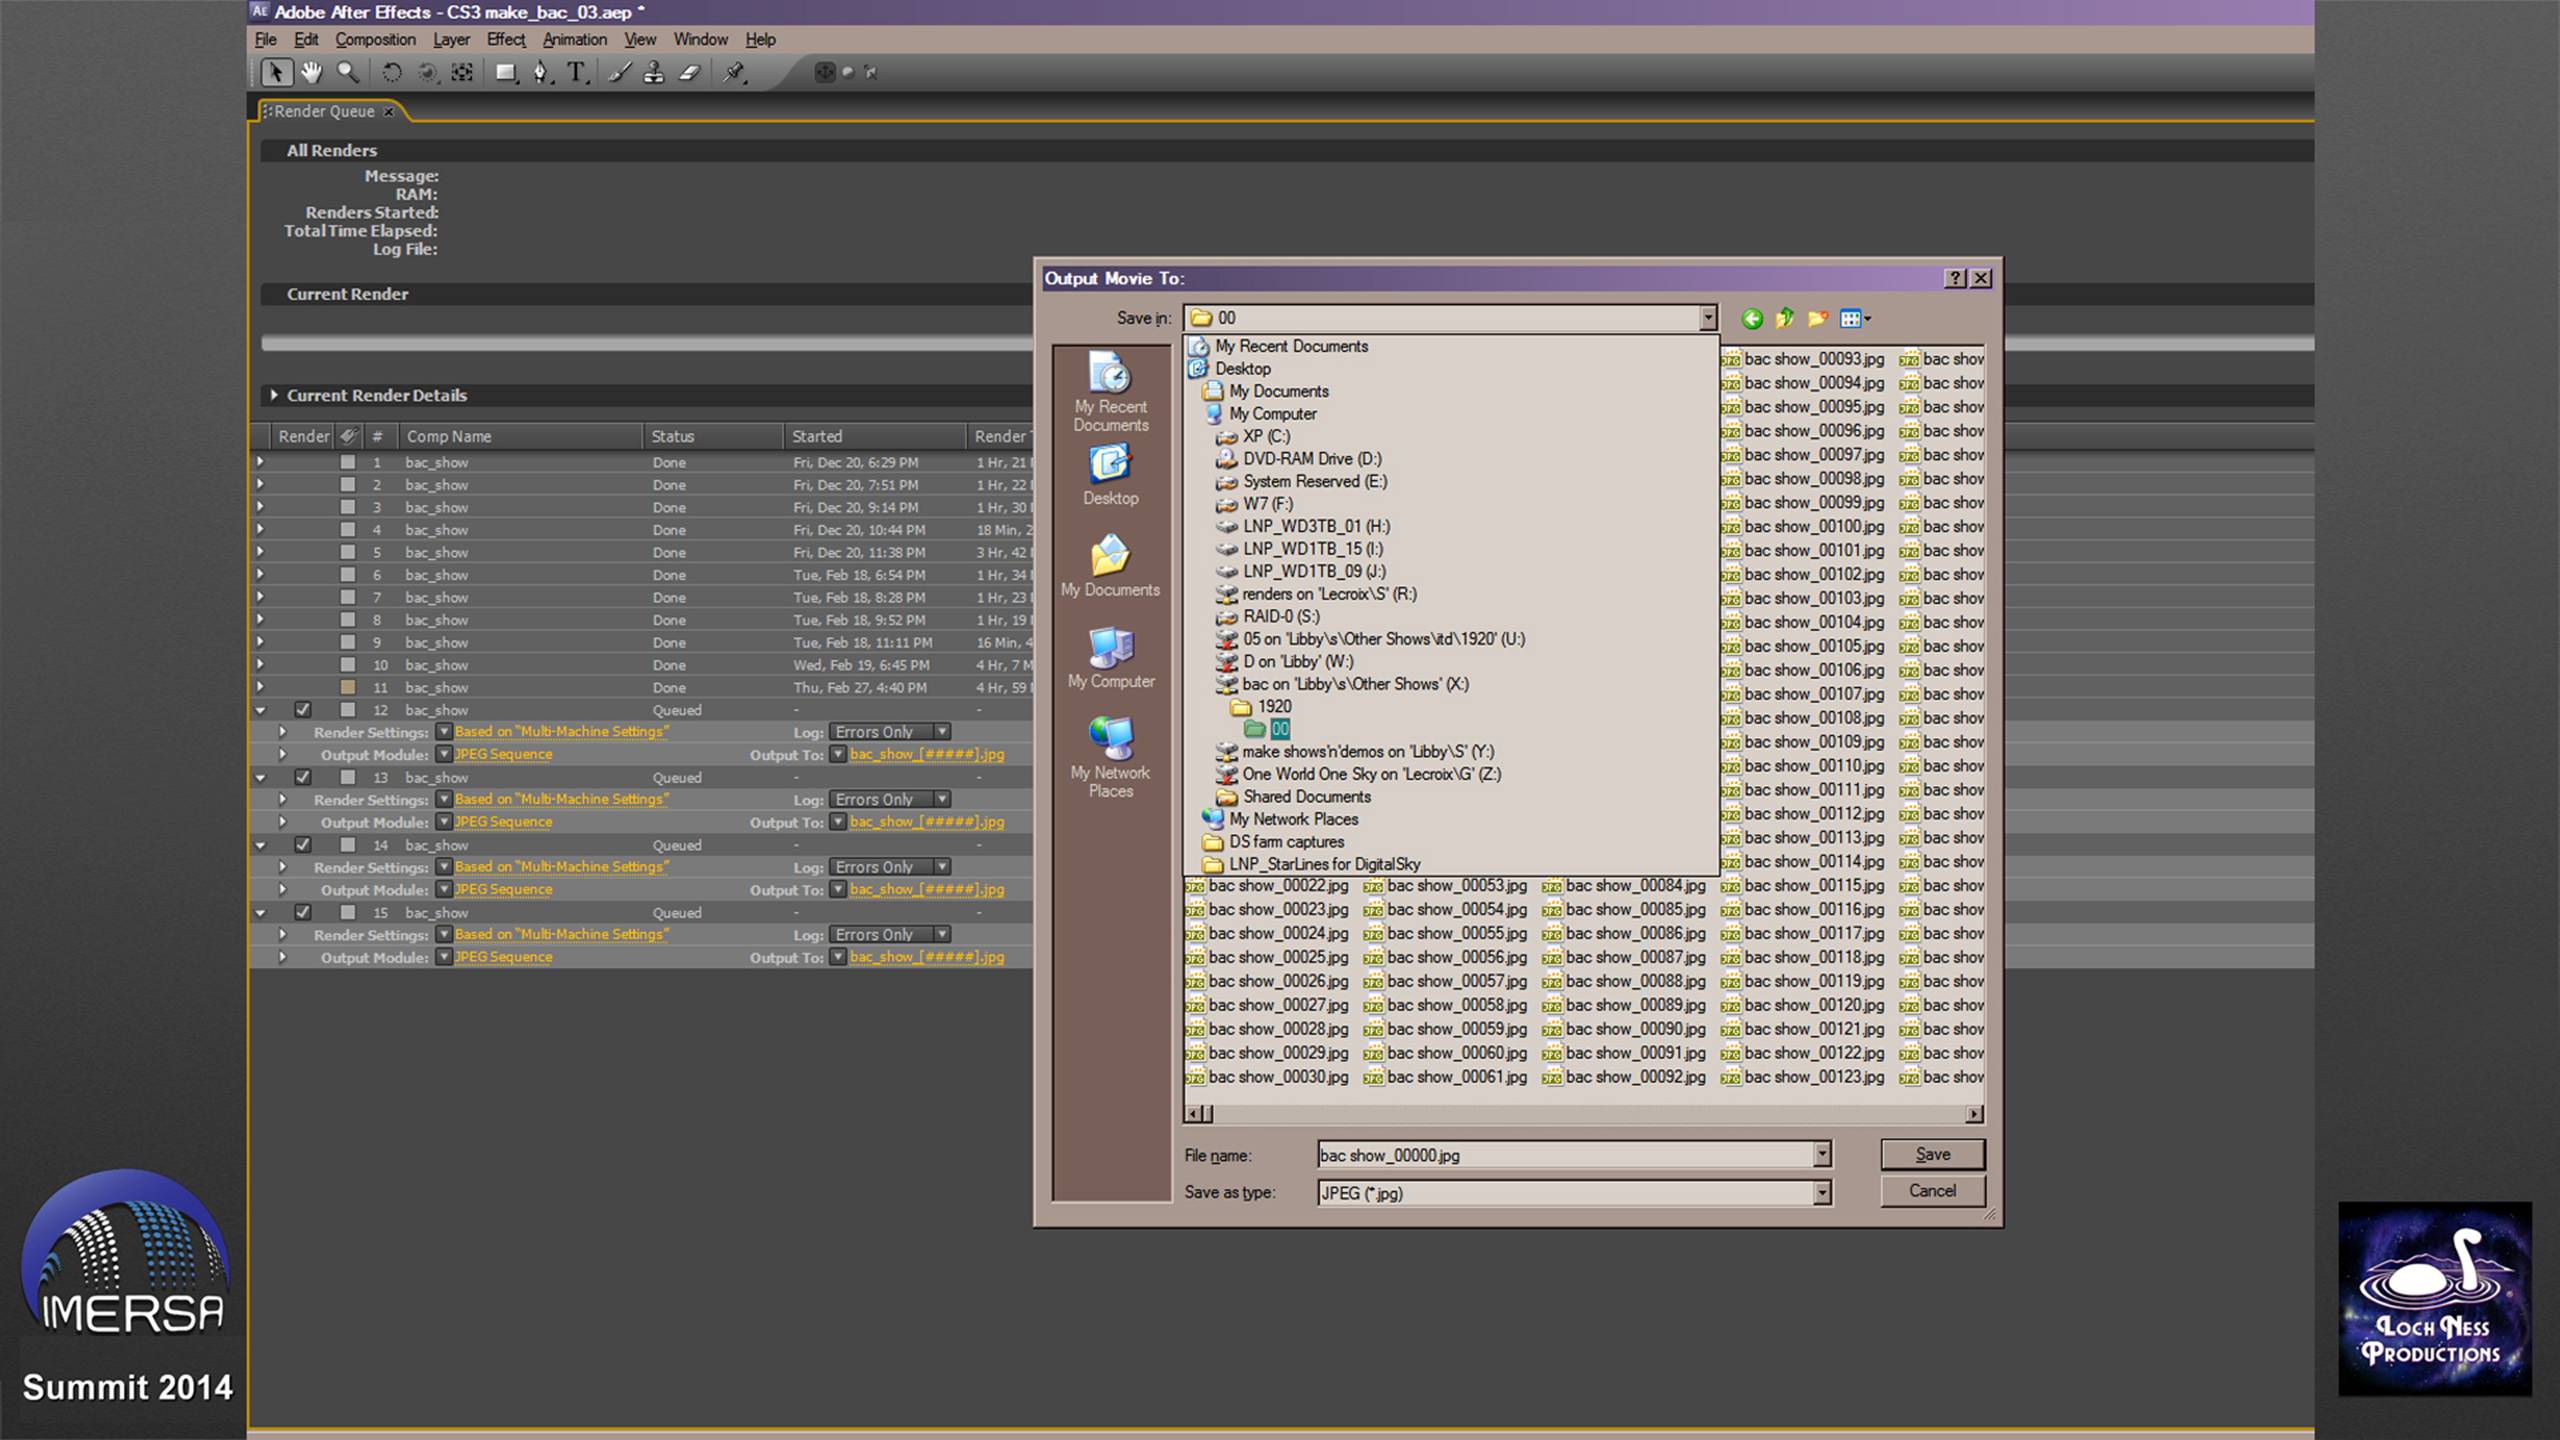
We're going to have all the machines render to the folders on the server, so we specify its location.
Then we repeat the process to get the other machines going. They all read the same project from the server, and write to it too. Come back the next day.
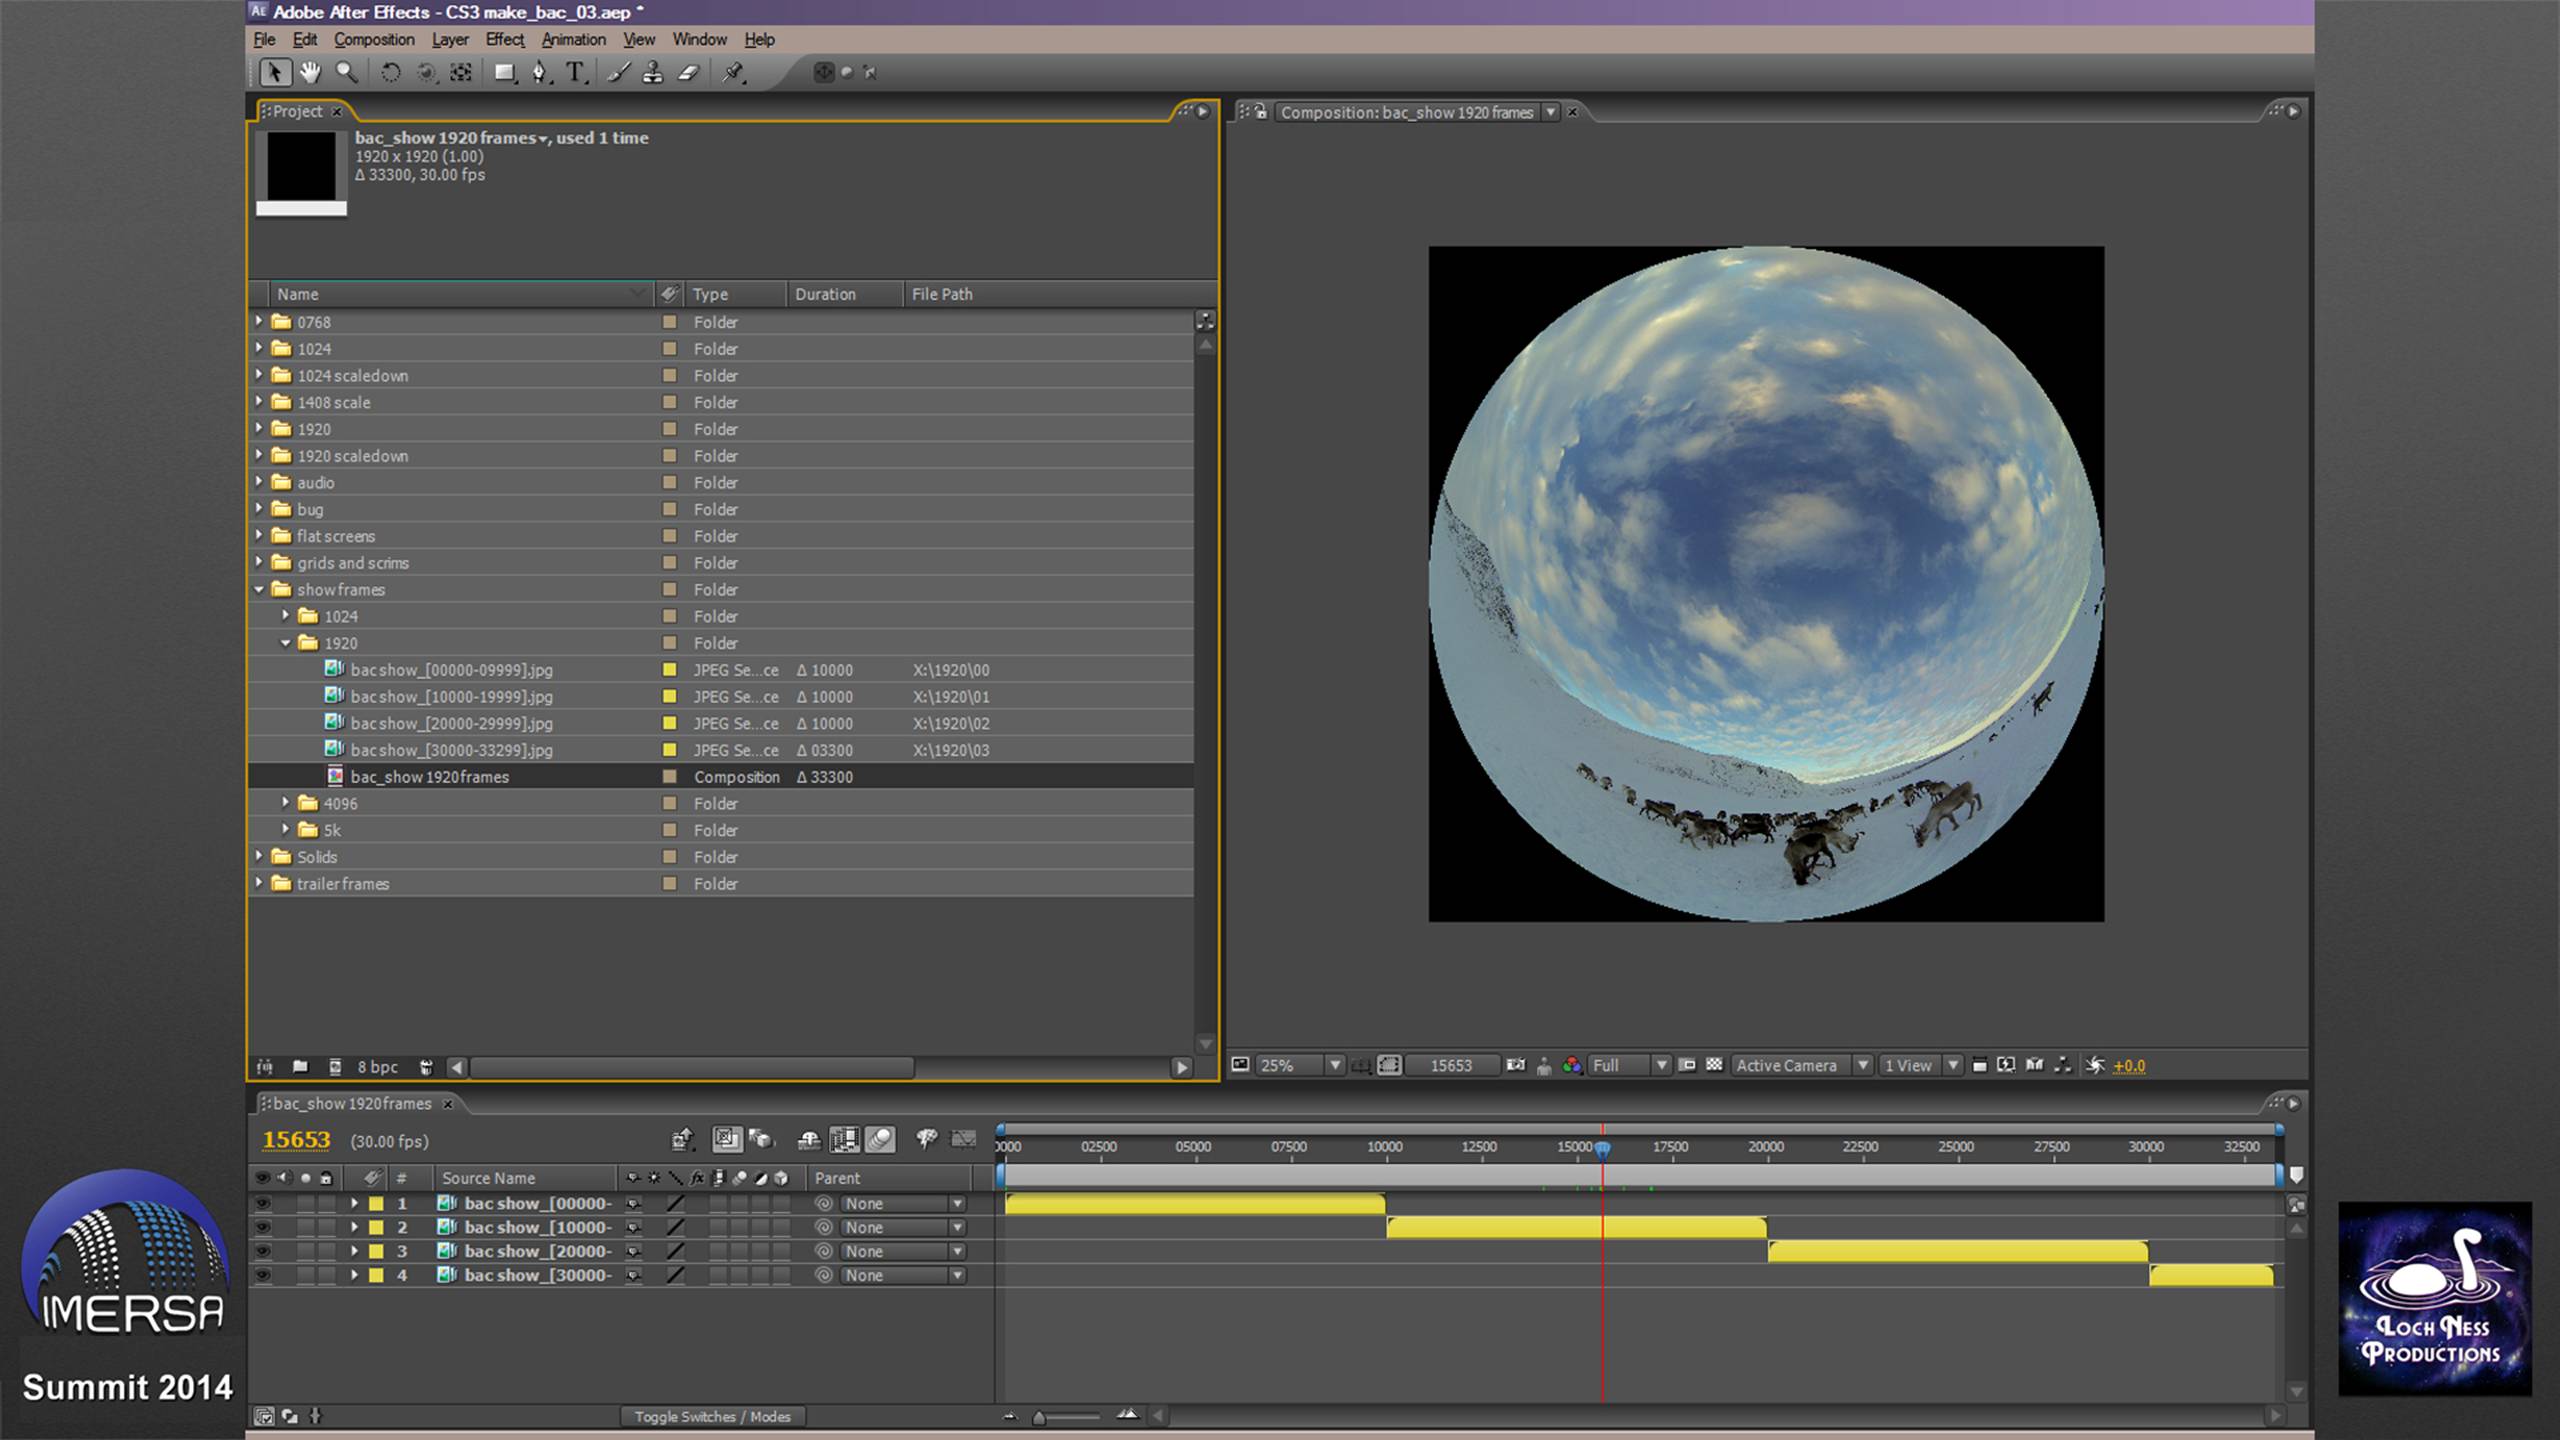
OK, now we're back to square one. This time we're going to ingest the new 1920 frames we just made. Same routine as with the 5K frames. Lasso them in Explorer, drag them into the "show frames 1920" folder, then onto the Composition icon; sequence the layers, and there we are.
We use the 1920 show frames composition as one source layer for our eventual movie, up in the 1920 folder in our Project window. We have a folder for every resolution we're eventually going to need to make.
For this example we're making a demo to show in one of the Geodomes over at the museum conference site. So I've added a watermark layer — a "bug" to identify onscreen the show, producer and distributor.
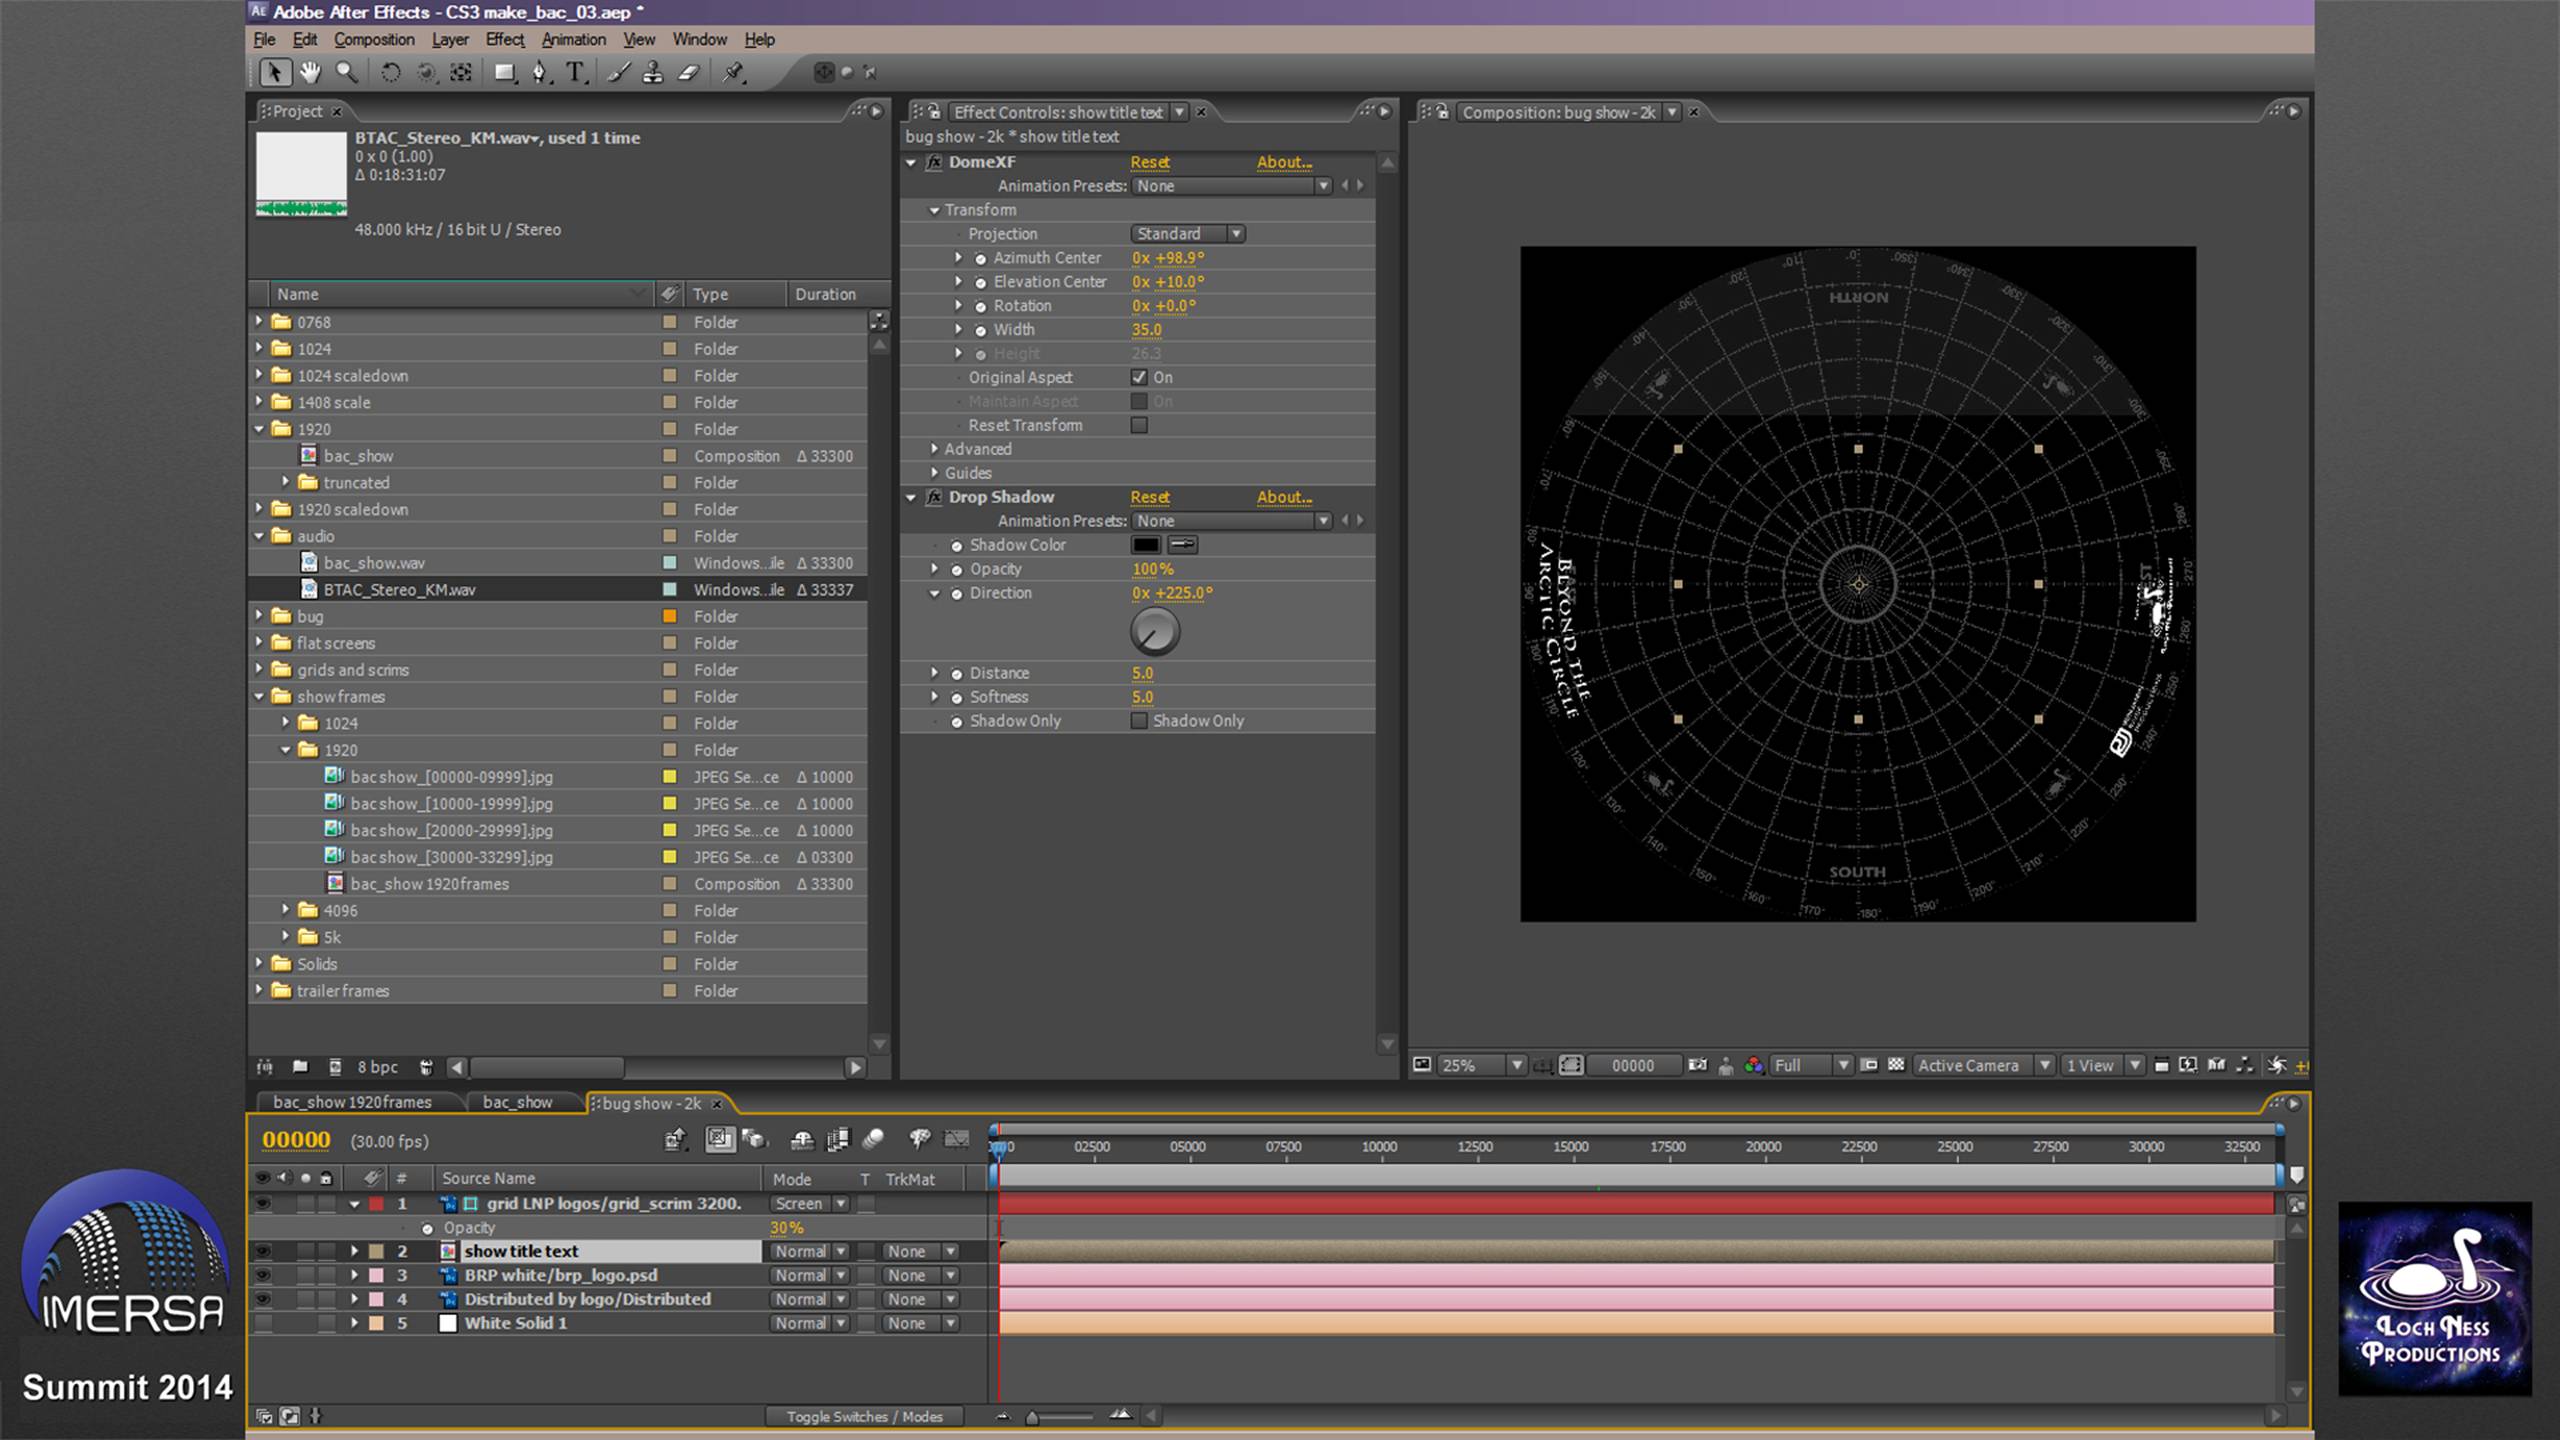
Here's the "bug" layer. The show title is just a text layer, the logos are Photoshop layers. I'm using Sky-Skan's plug-in DomeXF to do the curvature correction and place them east and west. To see where things are on the dome, I'm using our standard alignment grid overlaid in screen mode, with the opacity set to about 25%, so I can see through it, and I've made it a Guide Layer so it doesn't render.
I also added drop shadows to the layers, but I can't see them on the black background. So there's a white solid layer at the bottom, which I turned off after I adjusted the shadow.

I put the bug layer on top of the visuals.
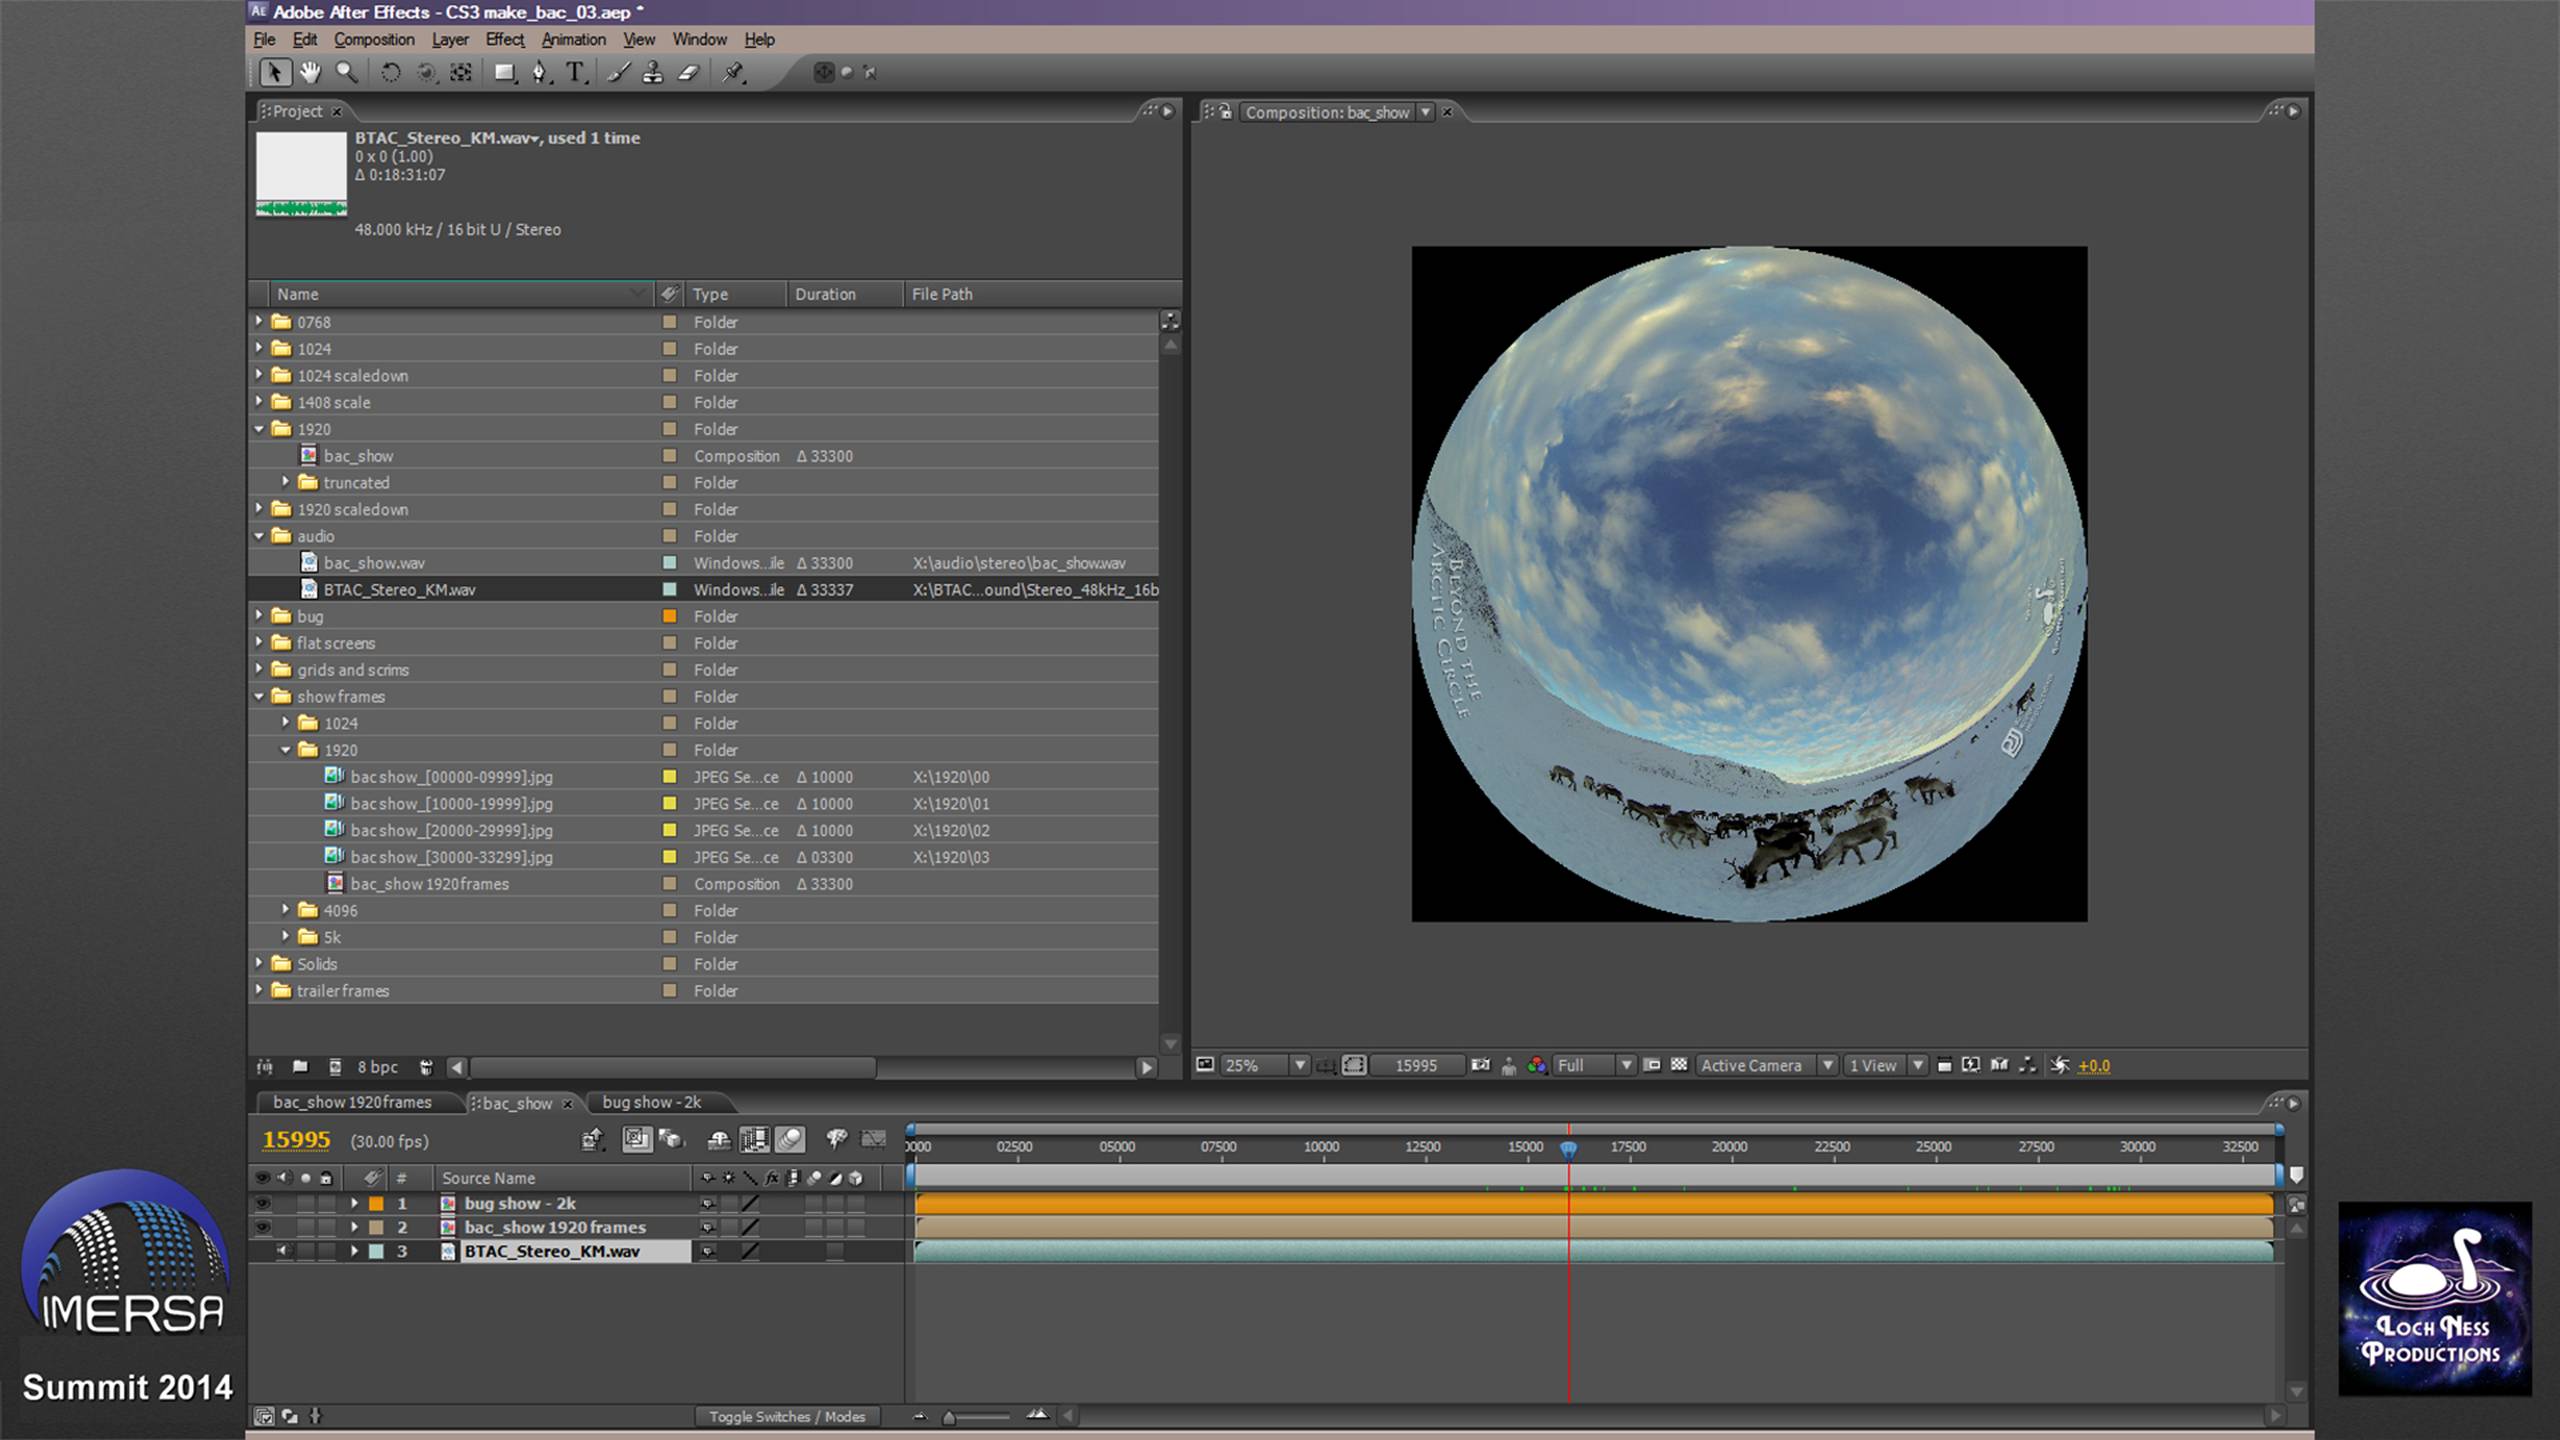
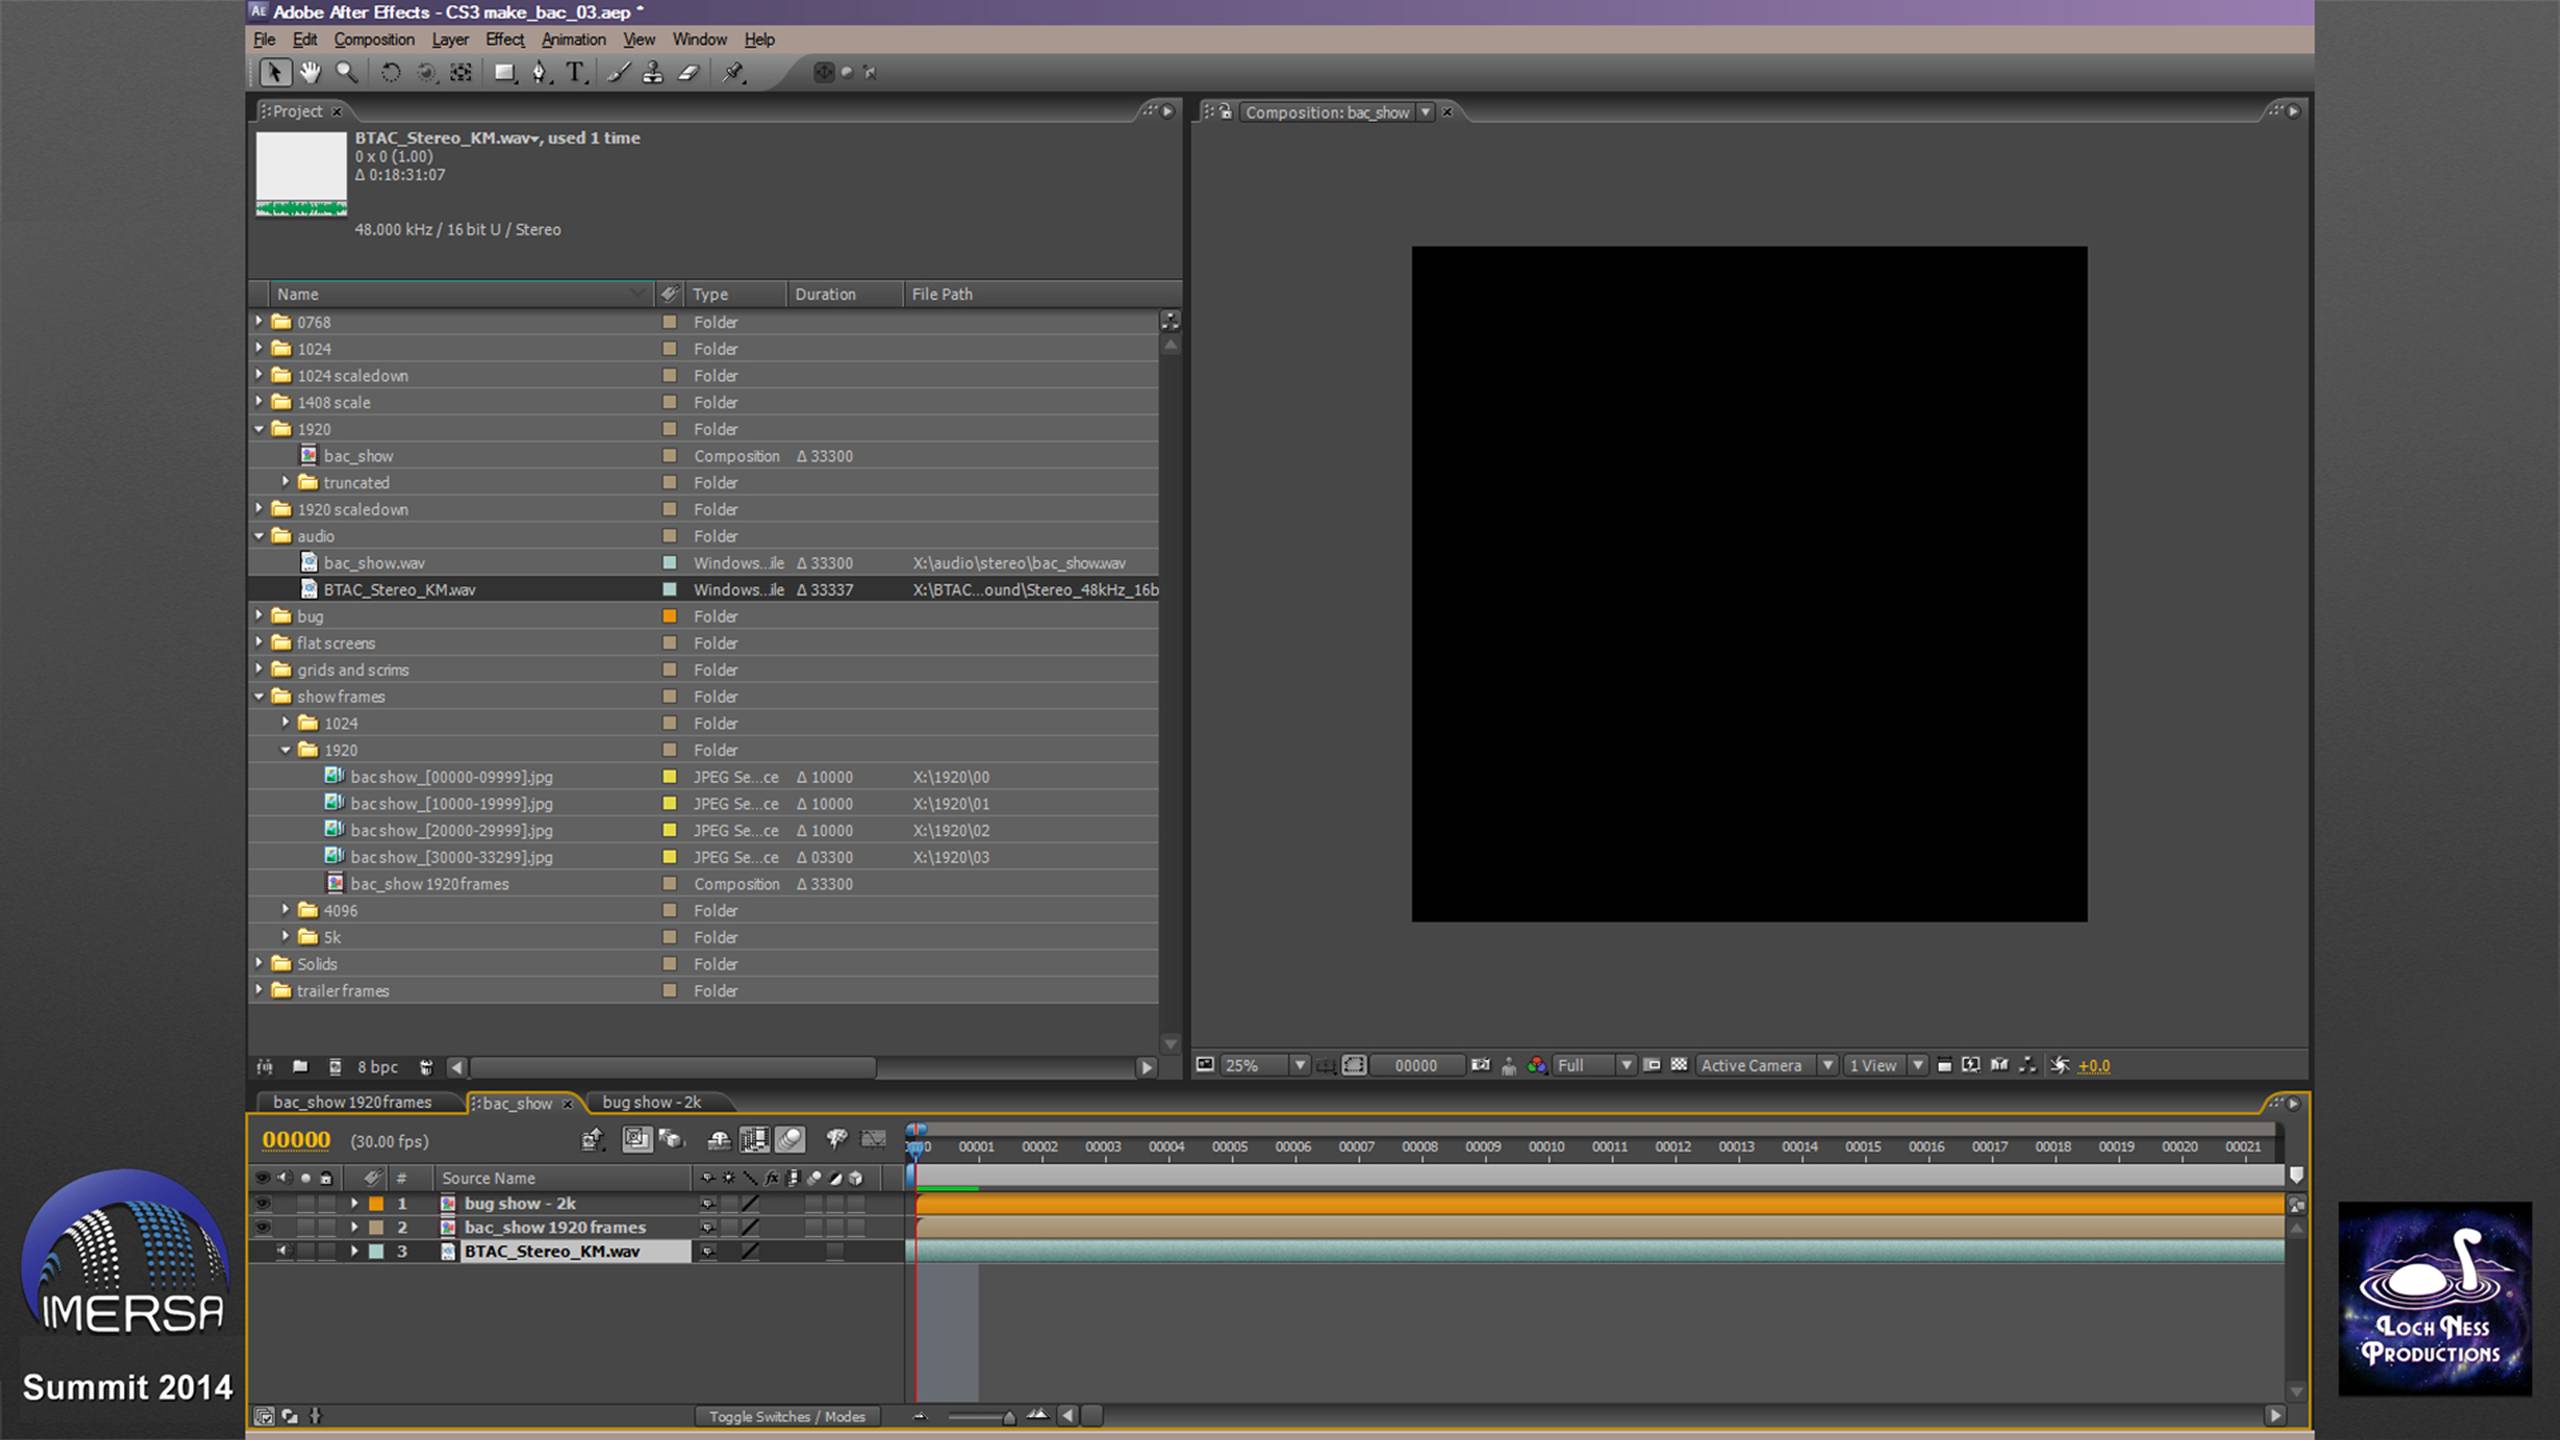
Next — add the audio. I drag the source WAV from Explorer into the "audio" folder in my Project, then drag it down to the timeline. Here's where you can run into problems if you're not careful. I'm in the habit of putting the audio at the bottom of the layer stack. But if the cursor wasn't at the beginning of the timeline, you have to drag the audio layer so it aligns at the front. You know the trick of holding down Shift while you drag, so the layer snaps to other layer boundaries, markers and such, right? Well I did that here. Looks okay at this magnification level...
But zoom in to maximum magnification, and look... the beginning of the audio layer is off somewhere to the left. The audio would not be in sync if we hadn't checked.
So you know the keyboard shortcut for snapping a layer to the timeline cursor? Left bracket.
So we do that... then, go check the last frame of the composition.
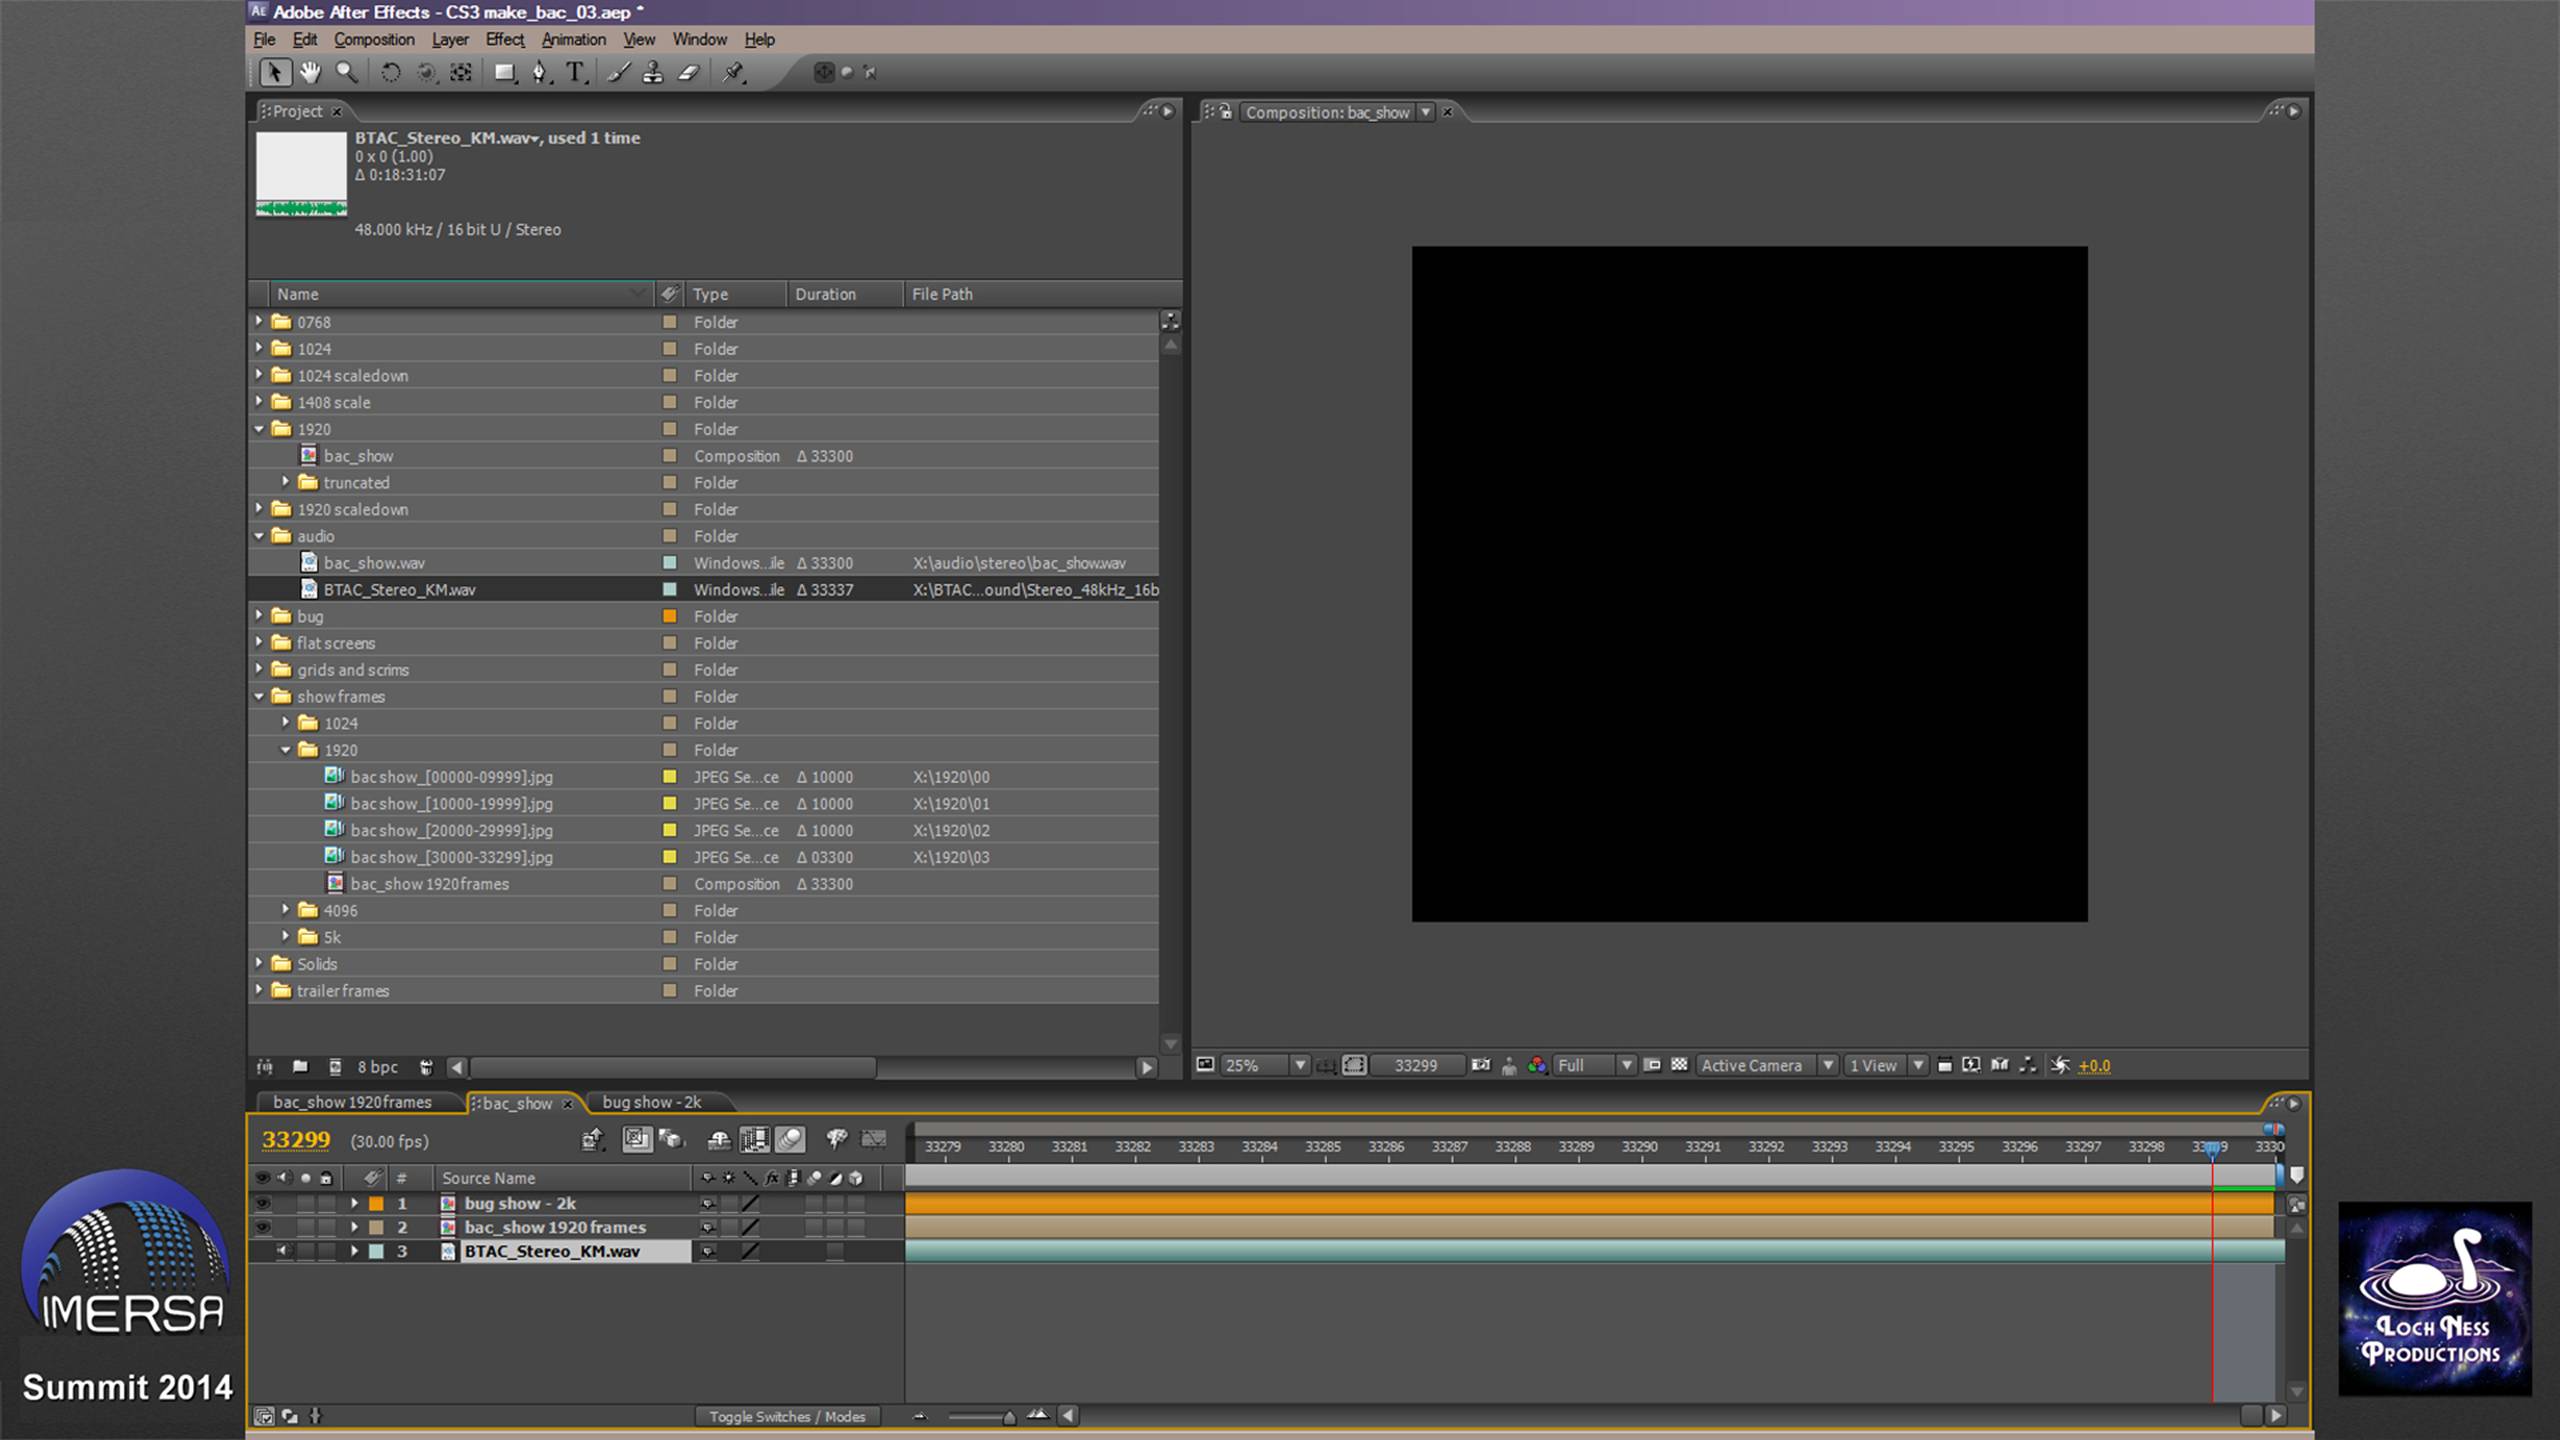
Look, it's extending off to the right. Oh no — the audio is not the same length as the visuals! Why not? Is this the old 29.97fps versus 30fps conundrum? We have no way of knowing. Houston, we've got a problem.
Moral of the story: make sure your audio is exactly the same length as your visuals. You might have to pad it with silence if it's too short, or truncate it if it's too long. Or add black frames. Whatever you do, check the front and back at full magnification. The layer bumpers MUST fit exactly, with no ability to slide around — or else we've got trouble right here in River City.
This also means you've followed the maxim:
First frame audio = first frame visual
Paste this on your wall.
(No countdowns, blip tones, flash frames, Academy leader, color bars and tones. Make life easy for everyone.)

OK, our audio is aligned, we're ready to render a movie.
Unlike the downscale, when rendering movies we can't throw multiple machines at the task. We start the movie going on one machine, and it's got to go all the way through to the end.
So since we're stuck with one machine per movie, we might as well render to its local hard drive, rather than have it try to write over the network to the server.
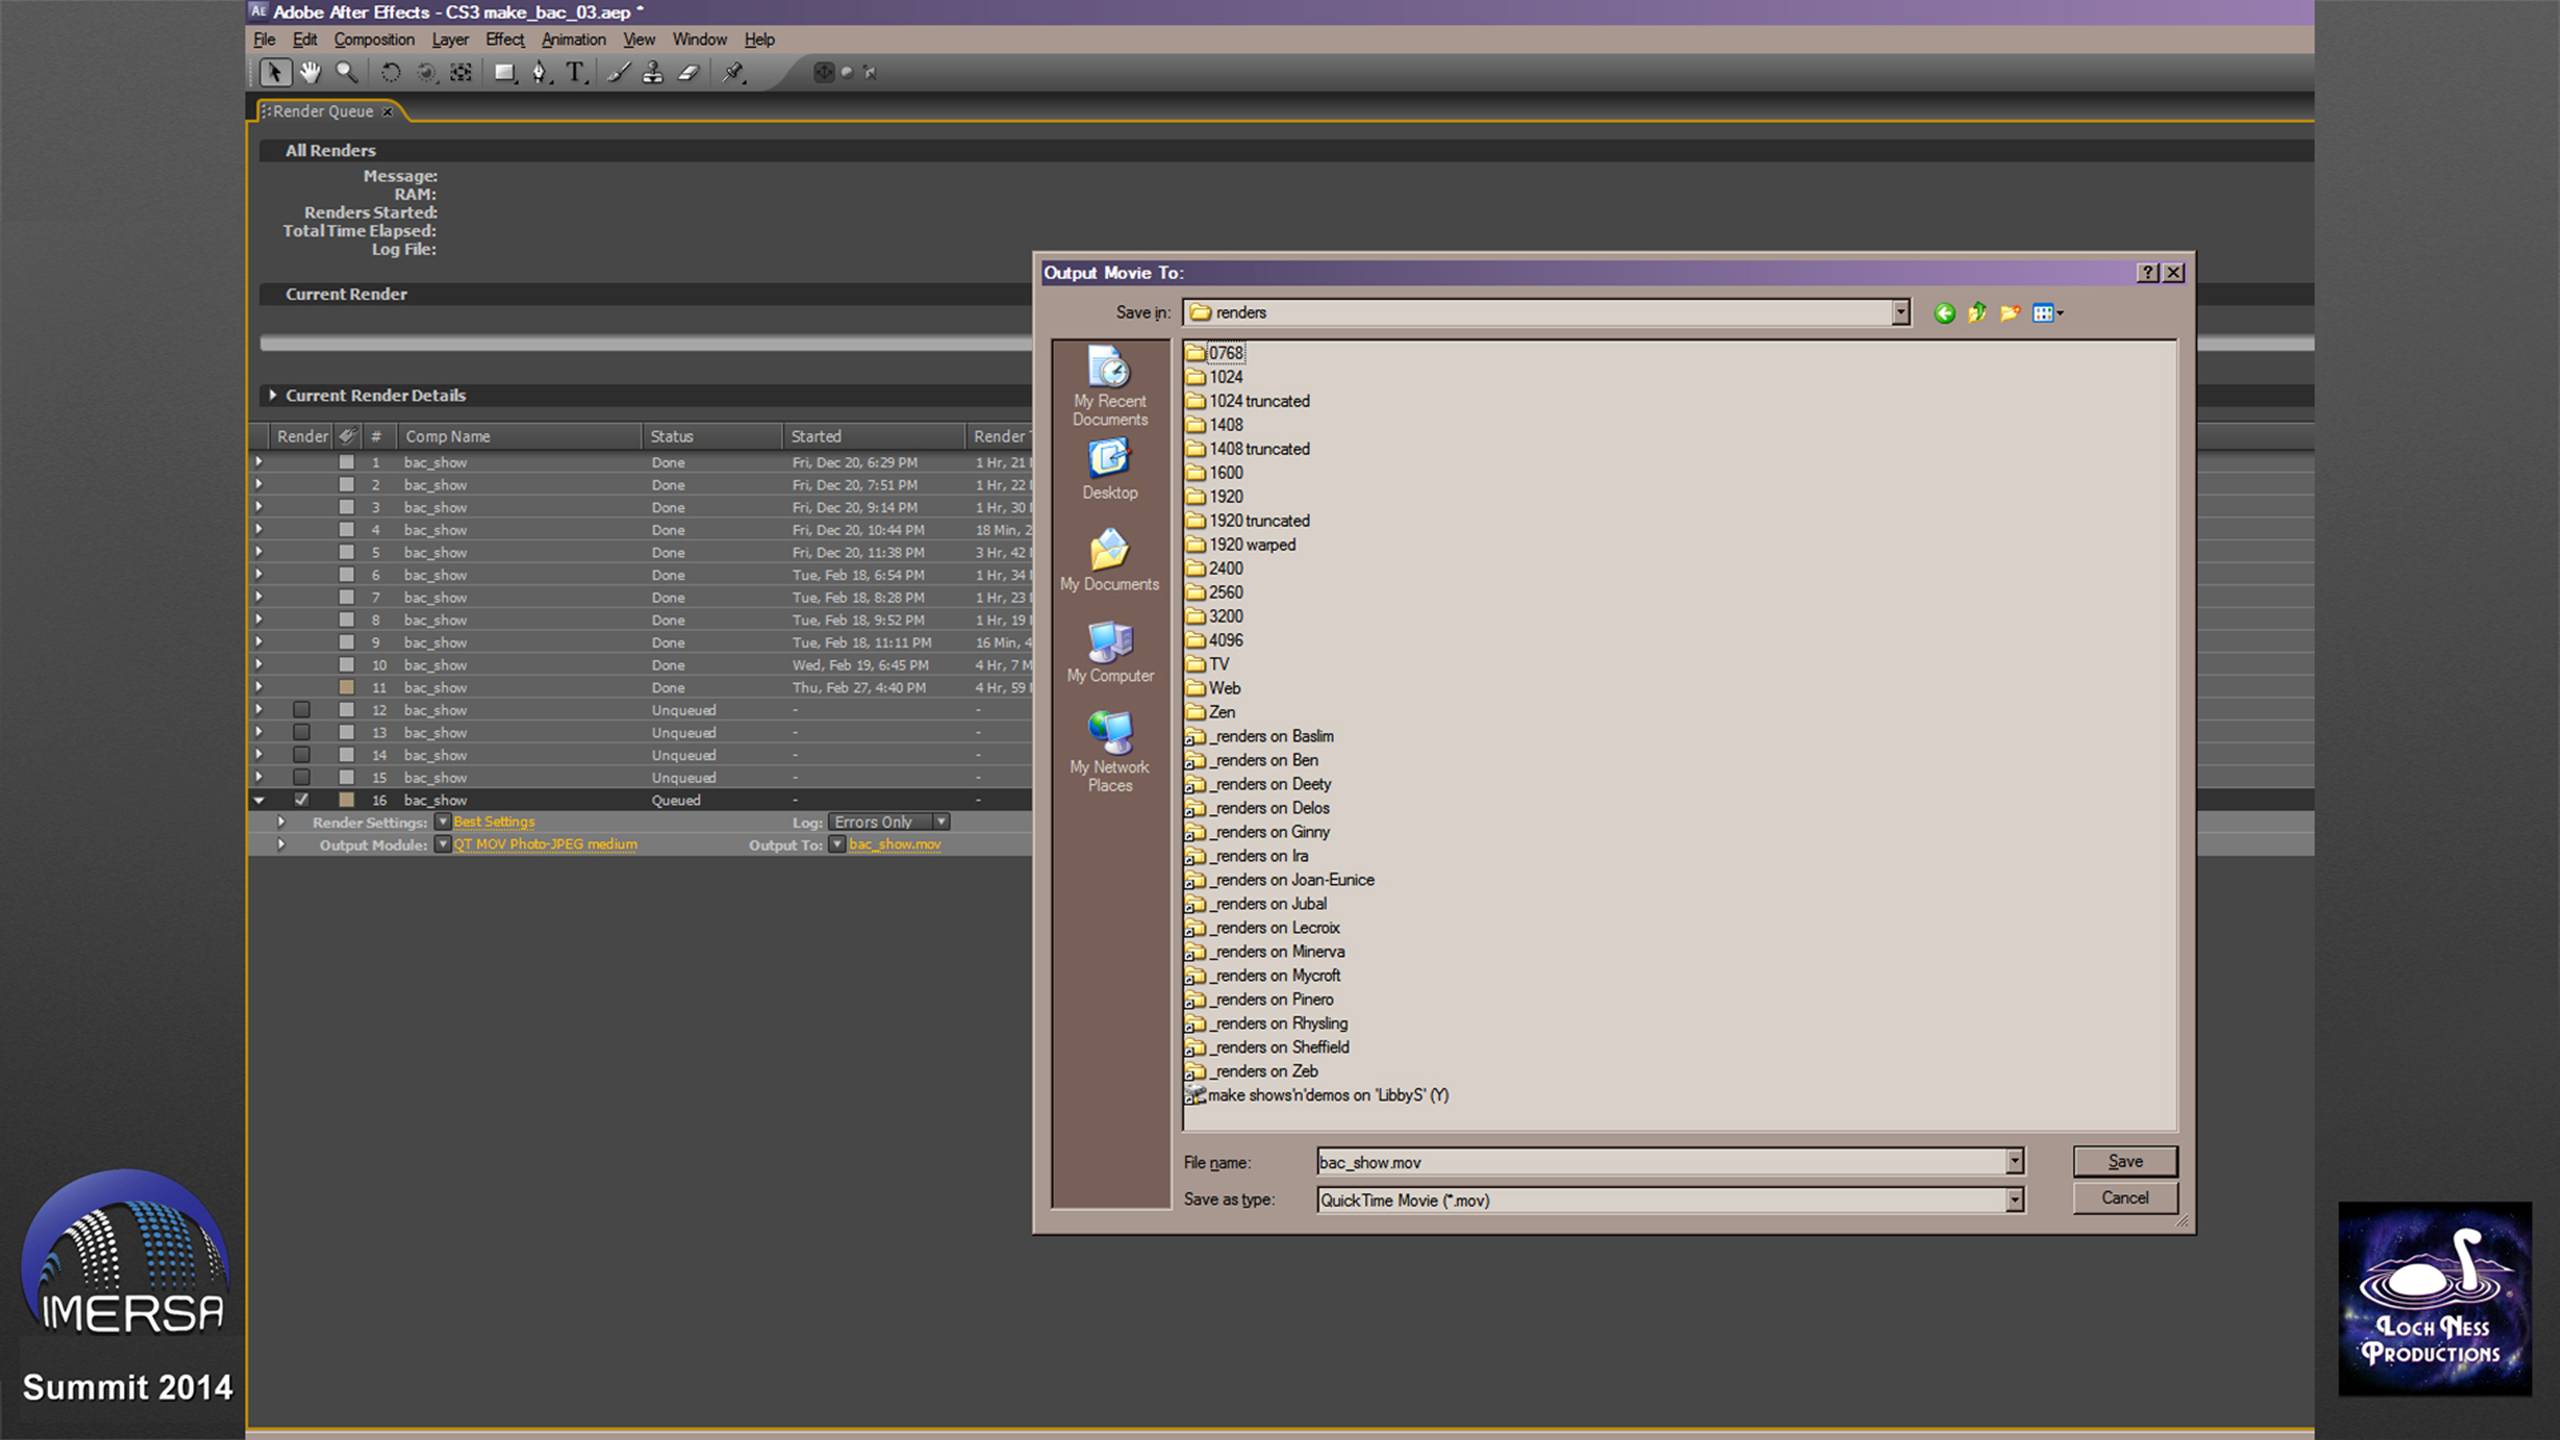
On each of my render machines, I have a folder called... "renders". And it contains folders for all the various sizes I'll ever render to. Since this is a 1920 pixel movie, it goes in the 1920 folder.
You'll note I also have shortcuts to the render folders on all the other machines in my farm. That way I can get to any folder on any machine, from any machine — with just one click.
But hold on. I just get off the phone with Greg Mancari, and he tells me the Geodomes have new projectors that are 1920 truncated, not full fisheye.
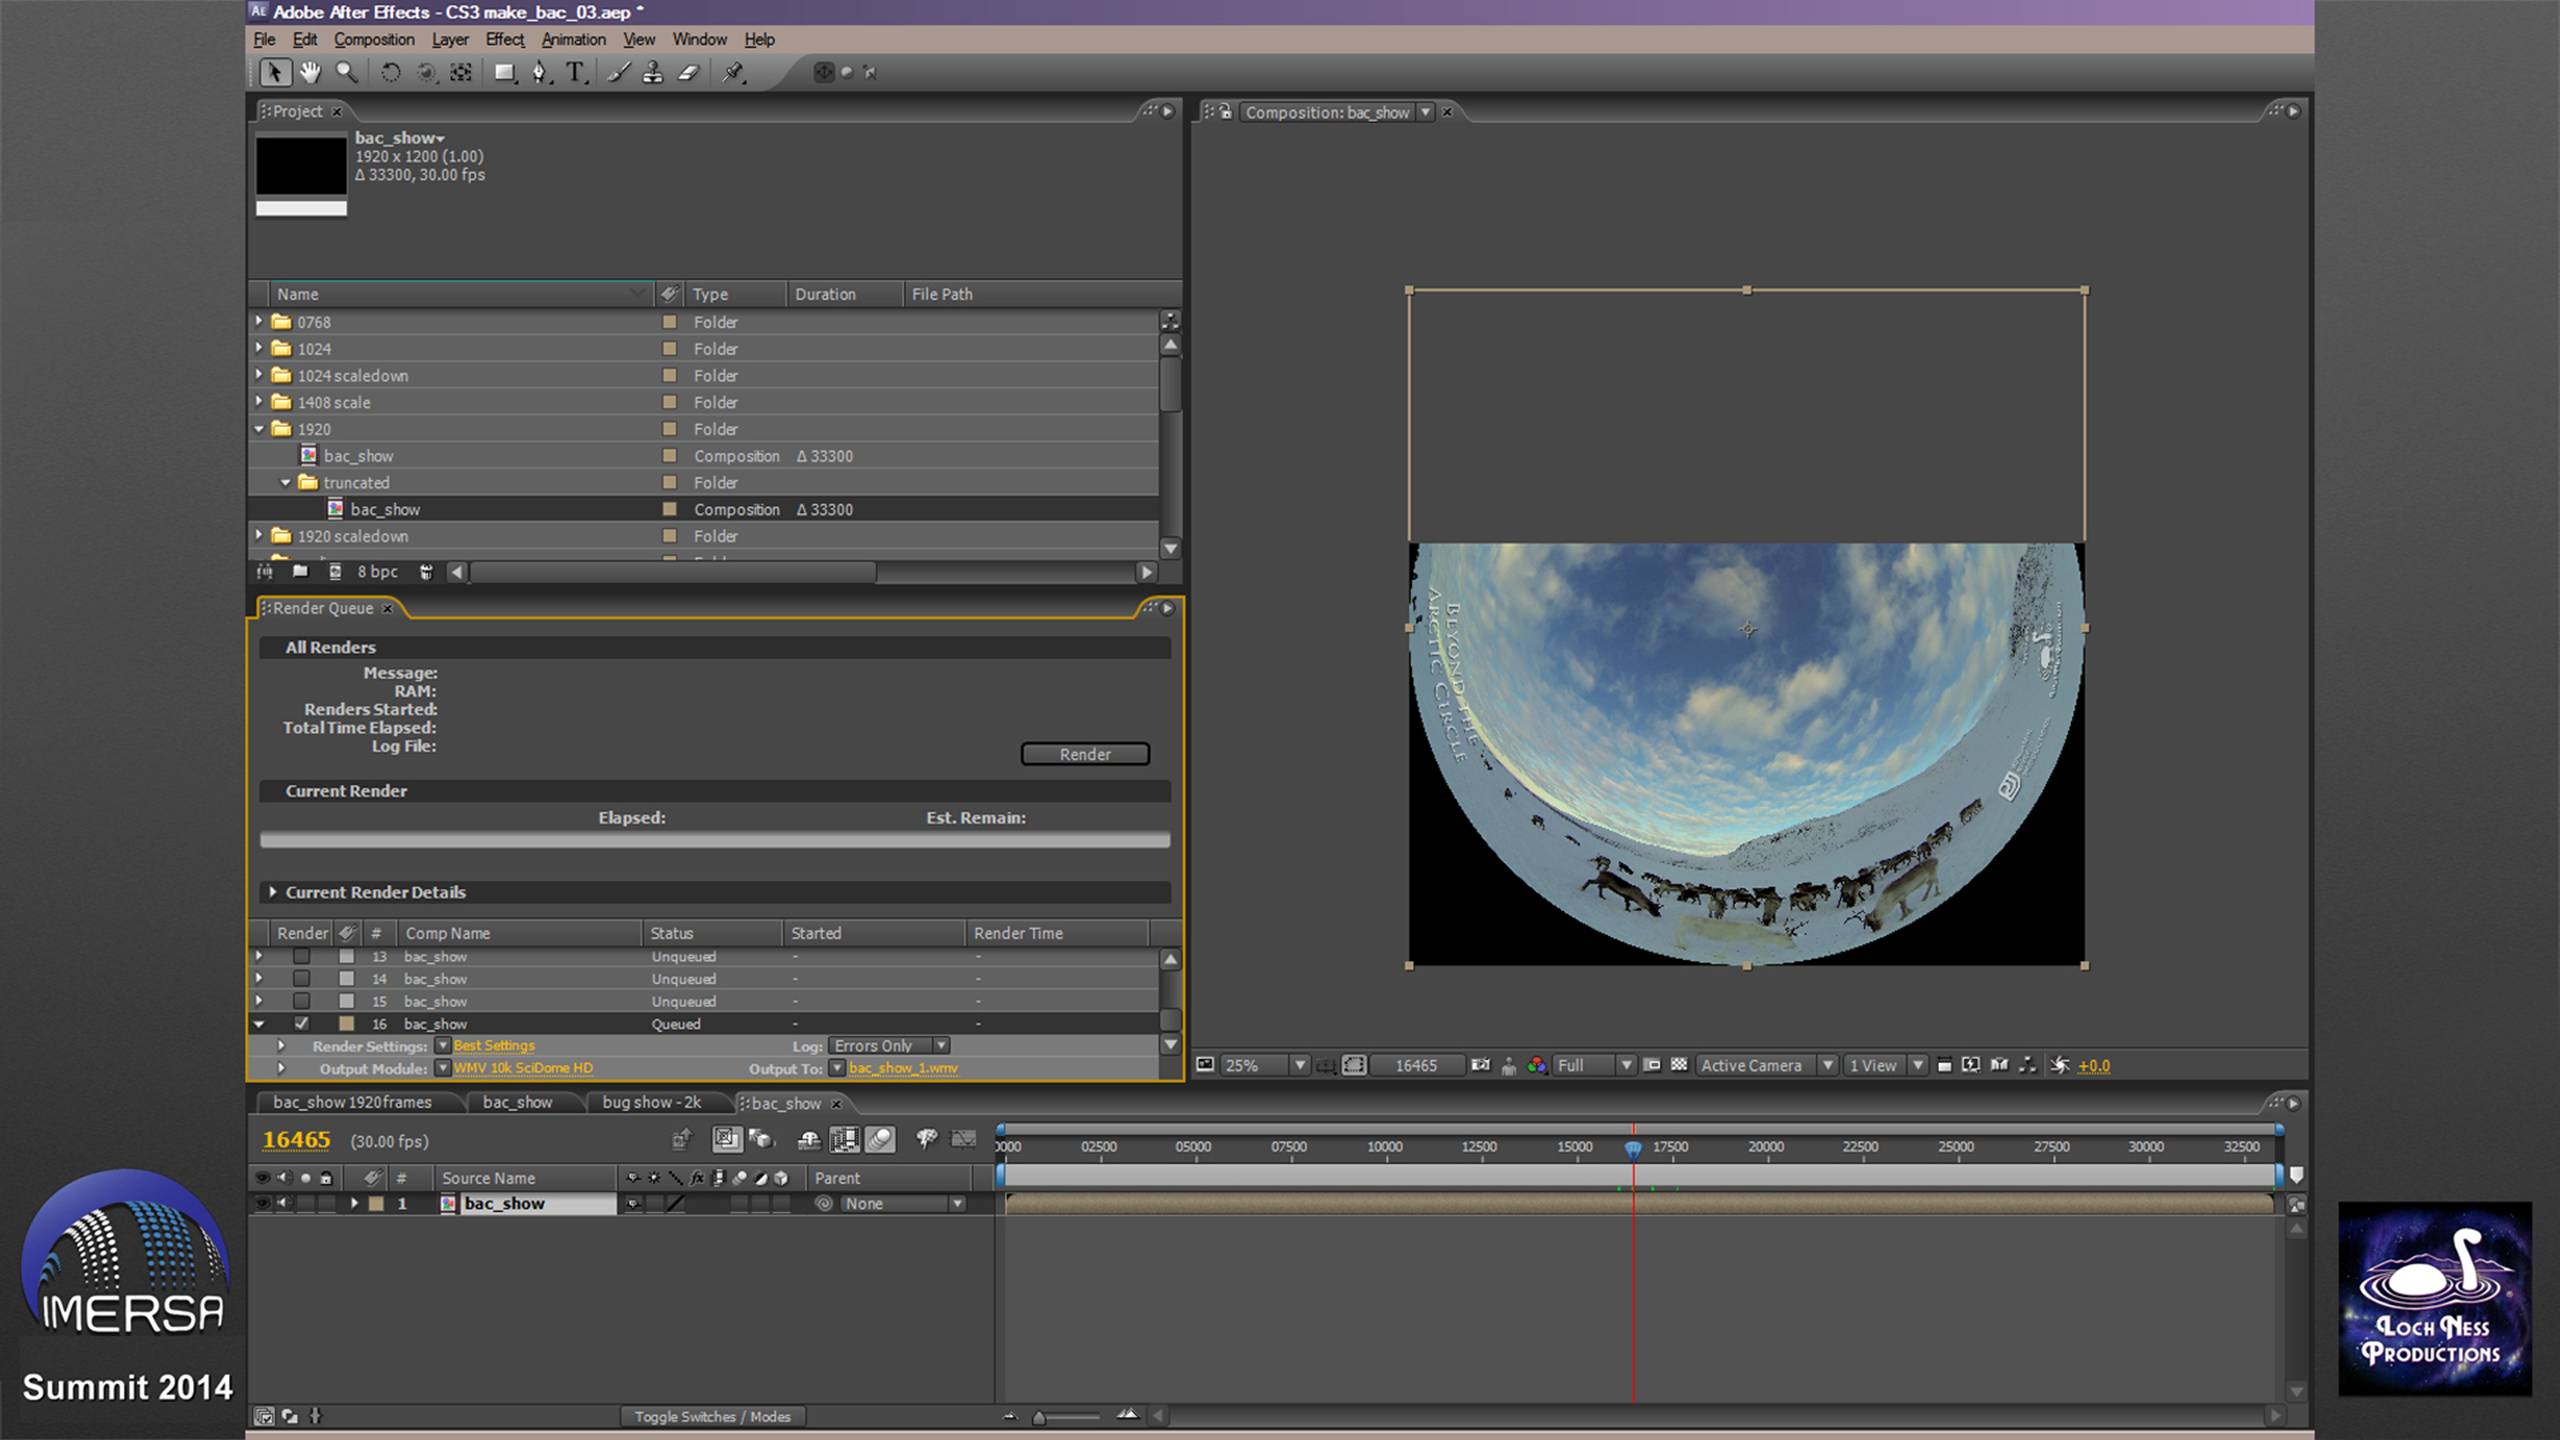
So I create a truncated composition, 1920 x 1200px, drag in the full 1920 composition, and adjust the vertical position up, like this. Now I can render my movie. Elumenati seems to like WMVs for movies, even though pretty much nobody else does.
Now, purists might look at that picture and say, you know, that's not fulldome — that's barely half-a-dome.
I'll end with that philosophical thought.
If you find this information useful, you can help support our efforts. Please go here.