| In the production studio: DVD player or drive |
| IF MAKING SLIDES: Computer with CD-ROM drive Image processing software Output device |
| In the theater: 1. At least three screens of slide projectors in L-C-R array |
| 2. A capable planetarium projector with Moon, planets, polar motion, and the ability to point out objects on cue. |
| Nice to have, but not critical: 3. Horizon panorama projectors 4. All-sky projectors 5. Zoom-slew 6. Bright pinpoint 7. Video |
HUBBLE Vision 2 Equipment Requirements
Although it has 200 images to show during its half-hour duration, HUBBLE Vision 2 is not a very complex show to present. Even a minimally-equipped planetarium theater should be able to program a professional presentation. We've provided this page to help you determine if your planetarium has the necessary equipment to present HUBBLE Vision 2.
The show soundtrack is recorded on DVD, so you'll need a DVD player to play the disc, even if it's just to copy the audio to another medium, such as multi-track tape or hard drive. The DVD also contains the programming reference video, as well as an optional stellar formation animation in video form.
The show's still images are recorded on data CD, so you'll need the resources (computer, image processing software, output devices) to transform the digital images into whatever form your theater uses to project. For classic (slide-projector-based) planetaria, that will mean making 35mm slides.
1. At least three screens (preferably dissolving) of slide projectors in Left-Center-Right array
This is a screen format familiar to long-time Loch Ness Productions customers.
Many of the scenes in our shows are illustrated with three images, which are introduced in sequential order: Left, then Center, then Right. After all three are up, they often "wipe" off in the same order.
To use the dissolve sequences as we intended, only one pair of dissovers is really necessary. But for timing, there are instances in which multiple dissolve pairs will come in handy.
While we've formed matched dissolve sequences with several image sets, they can also be used in side-by-side display, instead of overlapping crossfades, without adversely affecting their effectiveness too greatly.
2. A capable planetarium projector with Moon, planets, polar motion, and the ability to point out objects on cue.
HUBBLE Vision 2 features the planetarium star field at several points during the show, especially the opening and ending. We mention the view including the Moon and planets, so obviously that requires them to be up in the sky at the time!
During the show, we point out the Orion Nebula in the northern hemisphere, and the Large Magellanic Cloud and Eta Carinae in the southern hemisphere. In order to show the areas where the Hubble Deep Field images were taken (near the north and south celestial poles) in one scene, you need to position latitude near the equator. All this flipping around necessitates having a star projector with functioning polar motion!
The pointing out of objects can be done manually with a hand pointer, or you can position single-shot projectors with the "crosshairs target" indicator images we provide.
The rest of the time, we're looking at actual HST images, so the ability to fade your planetarium stars in and out will be indispensable.
3. Horizon panorama projector system
There are no horizon panoramas required in this show.
The only image that needs to appear on the horizon is the Earth chord, over which the Hubble flies (several times in the show). You could simply put our Earth chord image in one on your horizon pan projectors. Using a dedicated projector with a wide-angle or anamorphic lens to stretch the Earth chord image will work too.
This is in addition to the main screens, which project up in the sky, of course.
4. All-sky projector system
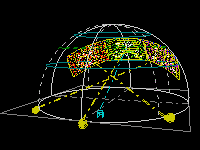
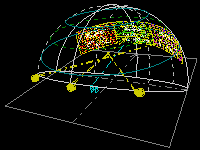
There are two all-skies which can be used in the show. One is a closeup of the center of the Orion Nebula (featuring the proplyds prominently); the other is a computer map of the large-scale structure of the Universe.
However, if you don't have an all-sky system, you can use the three abutting single frames we've extracted from the images, and display them in the L-C-R screens.
5. Zoom-slew
While non-moving slides can illustrate the scenes, the show will benefit from having the Space Telescope drifting slowly in orbit over the Earth chord. This scene happens repeatedly during the show.
6. PinpointWe mention how in the 1840s, Eta Carinae brightened to become the second brightest star in the sky. You can simulate this by positioning a point source (grain-of-wheat bulb, fiber-optic point, etc.) behind the dome at the position of Eta Carinae, and bringing it up to an appropriate brightness when called for. Projecting a pinpoint with a single-shot projector can work too. If you can't do any of that, we suppose the audience can just imagine how it looked.
7. Video
We've included a stellar formation sequence in video form. However, it's not required, because we've extracted nine still images from the video, and you can use those instead. Since it's the only video used in the show (and the imagery isn't from Hubble), you may decide the stills work better stylistically with the rest of the show.


